Installing 11g RAC on Linux VM: Copy/clone this virtual machine to create second node and modify host details
Previous: Add additional virtual Ethernet card and perform prerequisites in Linux
In order to copy/clone the VM for node 1 to another VM, first you need to cleanly shutdown the first host i.e. dbhost1
Once it is cleanly shutdown, you can either user VMWare’s clone option or simply copy the whole VM directory including .vmdk and .vmx files to another directory and name it node2.
Since this is identical copy if the first node, we don’t want to create IP conflict while starting the VM so this time start only VM for node2 using VMWare or VirtualBox.

When it prompts following, select “I moved it“. This will preserve all settings including IP address from node 1 VM. Otherwise it will copy the interfaces to ethx.bak and create new interfaces in Linux which we want to avoid.
Now node2 OS is booted, login with root user.
In order to change the IP address and hostname, follow these steps.
Make sure the /etc/hosts entries are correct.
[root@ dbhost2~]# more /etc/hosts
# Do not remove the following line, or various programs
# that require network functionality will fail.
127.0.0.1 localhost.localdomain localhost
#::1 localhost6.localdomain6 localhost6
192.168.112.101 dbhost1.paramlabs.com dbhost1
192.168.112.102 dbhost2.paramlabs.com dbhost2
192.168.112.103 dbhost1-vip.paramlabs.com dbhost1-vip
192.168.112.104 dbhost2-vip.paramlabs.com dbhost2-vip
192.168.111.101 dbhost1-priv.paramlabs.com dbhost1-priv
192.168.111.102 dbhost2-priv.paramlabs.com dbhost2-priv
192.168.112.105 dbhost-scan.paramlabs.com dbhost-scan
192.168.112.101 nfshost.paramlabs.com nfshost
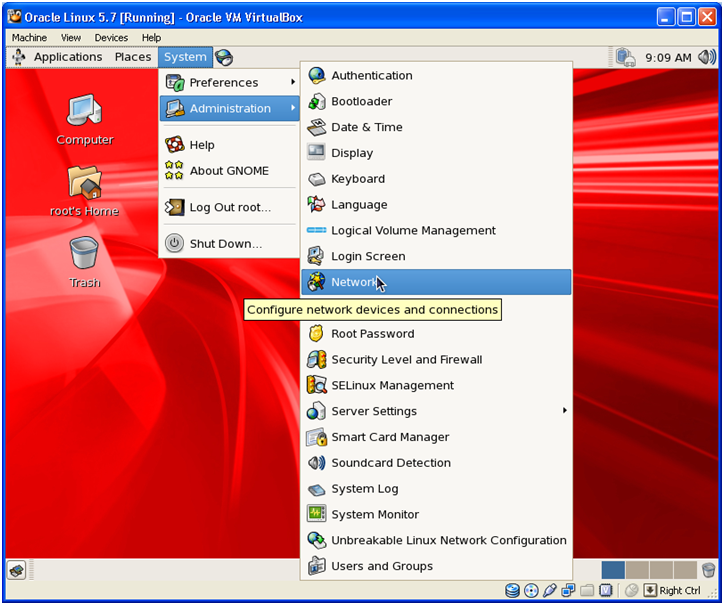
Now open the network setup screen as follows.
It will show 2 existing interfaces with IPs of node 1.
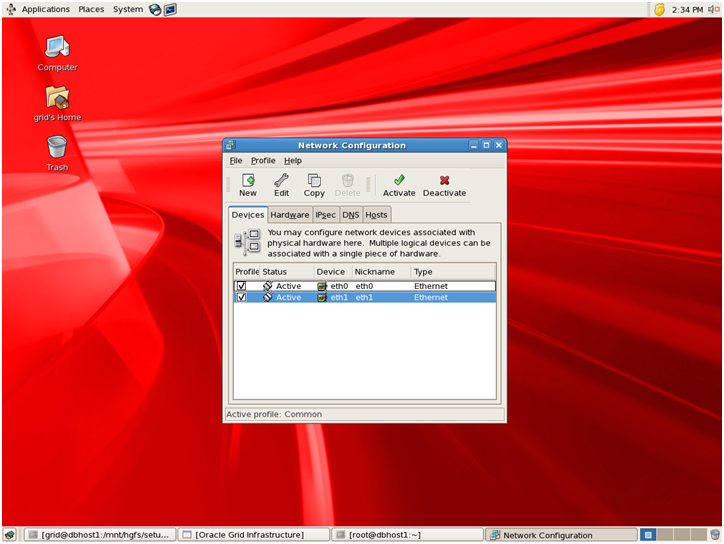
We need to change IPs for eth0 to match dbhost2 IP. While for eth1 it should match dbhost2-priv IP. Select the interface and click Edit to make the changes.
Once you change the IP addresses, make sure to save the configuration using File -> Save.
Once this is done, restart the network service using following command.
[root@ dbhost2~]# service network restart
Change the hostname to dbhost2
[root@r12host ~]# hostname dbhost2.paramlabs.com
Now let us change the system file which will assign the hostname next time system is booted.
[root@r12host ~]# more /etc/sysconfig/network
NETWORKING=yes
NETWORKING_IPV6=yes
HOSTNAME=dbhost2.paramlabs.com
Let us make sure that the host is pinging successfully.
[root@ dbhost2~]# ping dbhost2.paramlabs.com -c1
PING dbhost2.paramlabs.com (192.168.112.102) 56(84) bytes of data.
64 bytes from dbhost2.paramlabs.com (192.168.112.102): icmp_seq=1 ttl=64 time=0.191 ms
— dbhost2.paramlabs.com ping statistics —
1 packets transmitted, 1 received, 0% packet loss, time 0ms
rtt min/avg/max/mdev = 0.191/0.191/0.191/0.000 ms
Now you can restart Node 2 to make sure the new IPs and new hostname are preserved. Also we can start Node 1 now since there will be no conflict now.
This concludes the steps for creating second node for the RAC.
Next: Setup shared file system and other pre-requisites
1. Create Virtual Machine and install 64 bit Linux (generic step from previous post, not specific to this guide)
2. Add additional virtual Ethernet card and perform prerequisites in Linux
3. Copy/clone this virtual machine to create second node and modify host details
4. Setup shared file system and other pre-requisites
Recent Comments