Installing 12c RAC on Linux VM: Add additional virtual Ethernet card and perform prerequisites in Linux
Now since we have installed basic Linux VM as per our previous guide, we need to add additional Ethernet card for Oracle clusterware private interconnect IP.
Make sure that the OS is shutdown cleanly and VM shows Powered off status.
In VMWare, select the VM, right click and select Settings. Same option is available in Oracle VirtualBox as well.
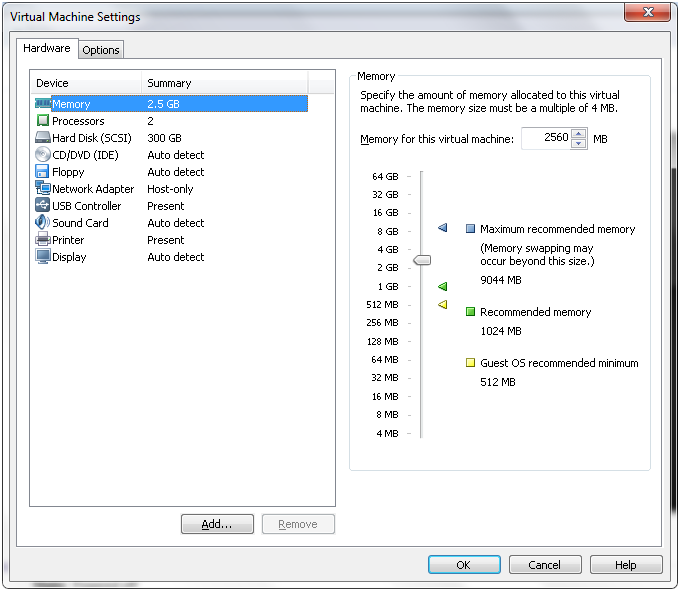
You will see above screen. Make sure that the memory is set to 3GB or 2.5GB. Click on “Add” to add new hardware

Select “Network Adapter” from the list and click Next
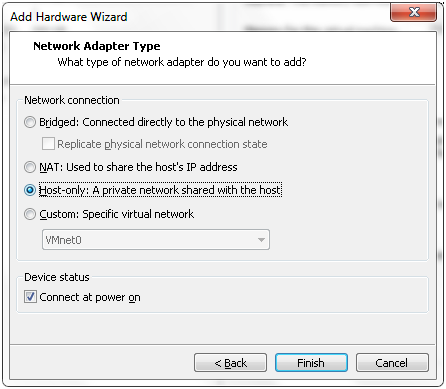
Select “Host-only” network and click Finish
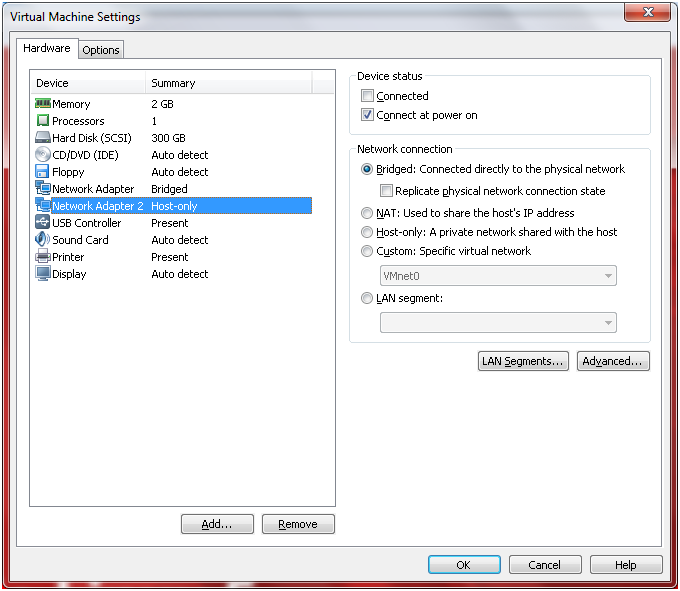
The settings page should now look as above. Click Ok to close the window.
Start up the Linux operating system in VM and login with root account.

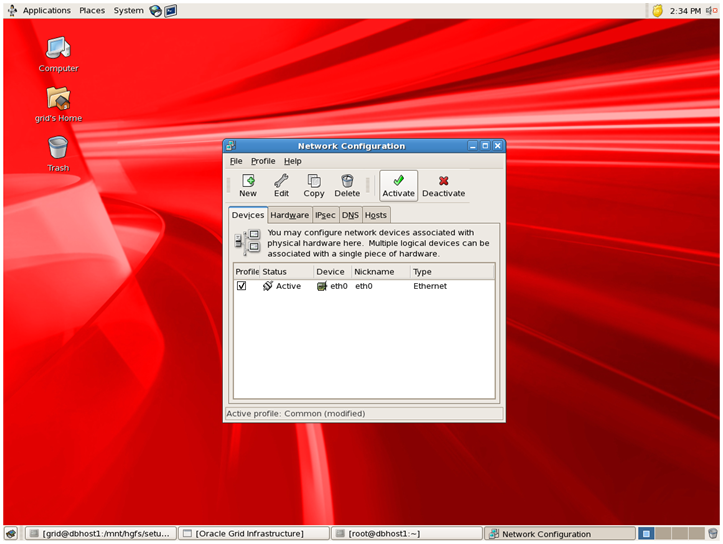
Click on System-> Administration-> Network to open network configuration screen
Click Edit to confirm the IP address.

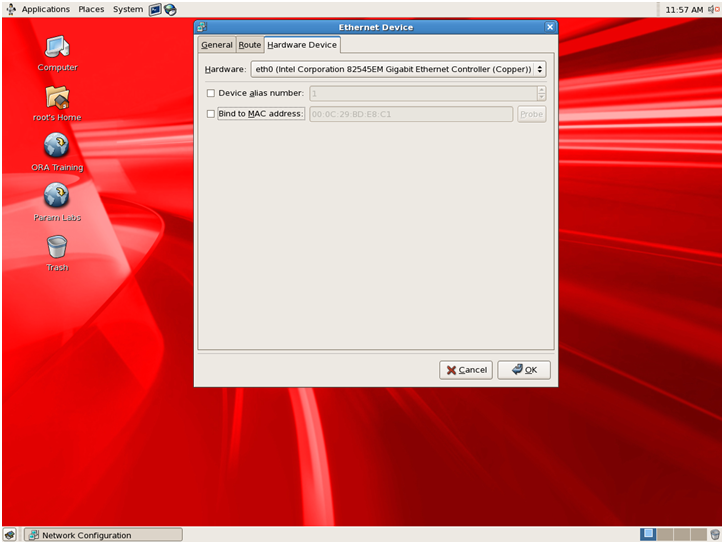
Optionally you can disable MAC address binding since you will clone this VM to another node.
You will see one interface eth0 here. Now we will add another interface in Linux for the new virtual network card. Click on New
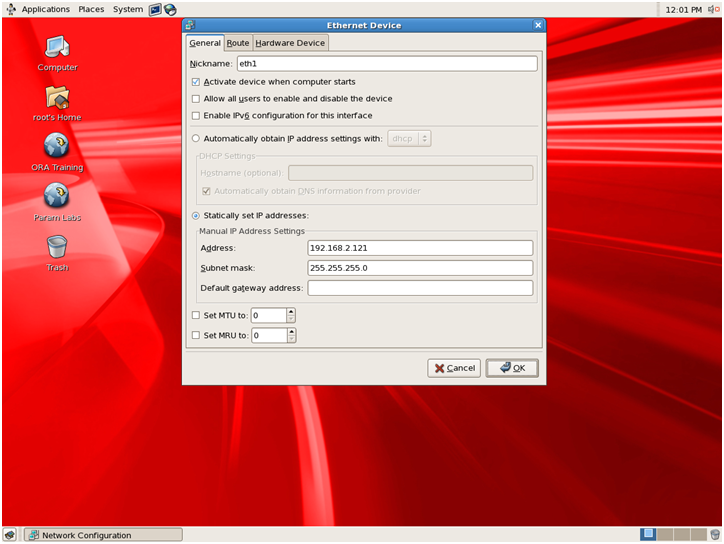
Specify another IP address in different range. Our previous eth0 IP is 192.168.1.121 so we have selected different subnet 192.168.2.121 for eth1
Do not specify any default gateway address here since these servers are generally connected to each other physically so in VM as well we will do the same.
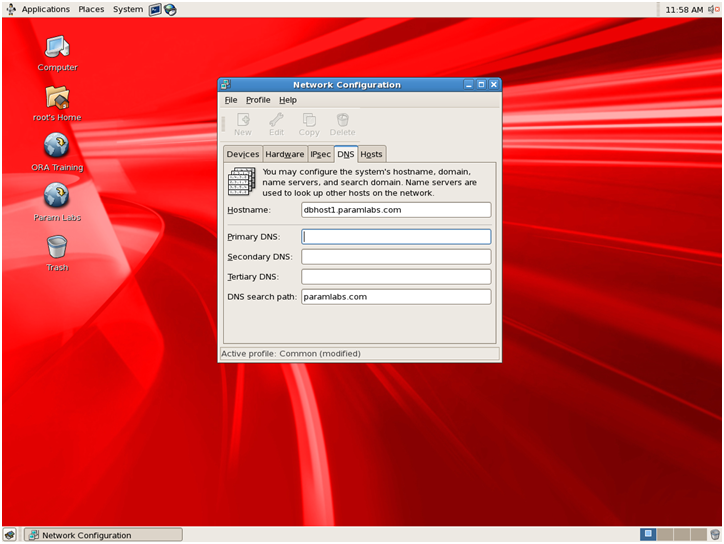
Make sure that the hostname is appearing correctly under DNS tab. You can change hostname here if required.

You will see that still new interface shows as Inactive. Select the interface and click “Activate“
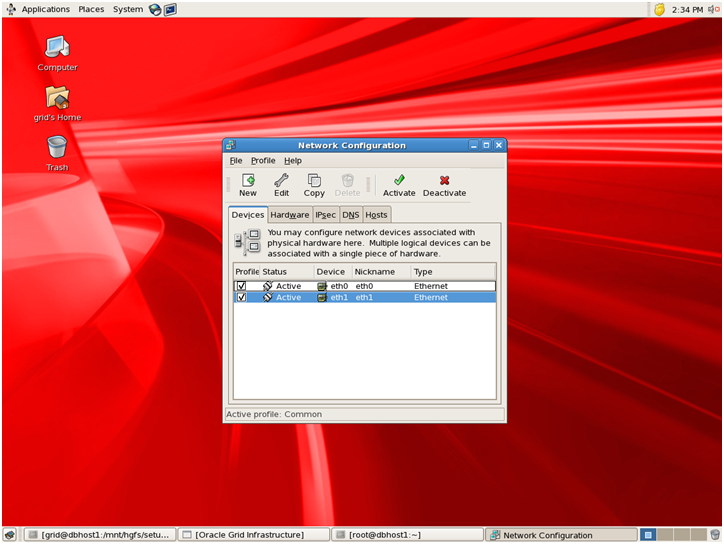
Now both will show up as “Active”. Make sure to save configuration by clicking on “File-> Save”.

Once you have saved the configuration, you can restart network service to see if the new configuration is still active.
[root@dbhost1 ~] service network restart
Comment out entries from /etc/resolv.conf to disable DNS search if you are not using DNS to resolve host names. This will greatly improve performance of VM in general especially NFS
Note: in 12c we need to rename /etc/resolv.conf file if you are not using DNS since the pre-requisites check will fail otherwise.
[root@dbhost1 ~]# mv /etc/resolv.conf /etc/resolv.conf_bak
If you are just modifying existing Linux VM and changing host name only then make sure that the new hostname is already present in following file. For fresh installation this will be already present.
Create following entries in /etc/hosts file
[root@dbhost1 ~]# more /etc/hosts
# Do not remove the following line, or various programs
# that require network functionality will fail.
127.0.0.1 localhost.localdomain localhost
#::1 localhost6.localdomain6 localhost6
192.168.1.121 dbhost1.paramlabs.com dbhost1
192.168.1.122 dbhost2.paramlabs.com dbhost2
192.168.1.123 dbhost1-vip.paramlabs.com dbhost1-vip
192.168.1.124 dbhost2-vip.paramlabs.com dbhost2-vip
192.168.2.121 dbhost1-priv.paramlabs.com dbhost1-priv
192.168.2.122 dbhost2-priv.paramlabs.com dbhost2-priv
192.168.1.125 dbhost-scan.paramlabs.com dbhost-scan
192.168.1.121 nfshost.paramlabs.com nfshost
Let me explain why we have made these entries.
dbhost1 and dbhost2 are primary IP addresses for both Virtual nodes. Though we are yet to create node2, let us create these entries so that when we clone/copy this VM, we will already have these entries present in second node.
dbhost1-vip and dbhost2-vip are going to be used as VIP for 11gR2 RAC. These IPs will be assigned to interface aliases on respective host where vip1 and vip2 will be active. This will be handled transparently by Oracle RAC
dbhost1-priv and dbhost2-priv are private interfaces for node1 and node2. These will work as interconnect IP addresses for these nodes. In physical servers, these interfaces are connected through a cross-cable or stand-alone switch (recommended). While in VM, this will be taken care of automatically.
Make sure that you are able to ping primary IP of node1.
[root@ dbhost1~]# ping dbhost1 -c1
PING dbhost1.paramlabs.com (192.168.1.121) 56(84) bytes of data.
64 bytes from dbhost1.paramlabs.com (192.168.1.121): icmp_seq=1 ttl=64 time=0.076 ms
— dbhost1.paramlabs.com ping statistics —
1 packets transmitted, 1 received, 0% packet loss, time 0ms
rtt min/avg/max/mdev = 0.076/0.076/0.076/0.000 ms
If you are not using time synchronization using NTP then make sure that the service is stopped.
[root@ dbhost1~]# service ntpd status
ntpd is stopped
Run following on both nodes to rename ntp.conf file
[root@ dbhost1~]# mv /etc/ntp.conf /etc/ntp.conf.orig
Let us now create required users.
First create owner user for Oracle clusterware/grid.
[root@dbhost1 ~]# useradd -g dba -G oinstall grid
[root@dbhost1 ~]# passwd grid
Changing password for user grid.
New UNIX password:
Retype new UNIX password:
passwd: all authentication tokens updated successfully.
Since we already have user named oracle (as part of our linux installation steps), we will make sure that the groups are set correctly. This will be database owner user.
[root@ dbhost1~]# usermod -g dba -G oinstall oracle
[root@ dbhost1~]# passwd oracle
Changing password for user oracle.
New UNIX password:
Retype new UNIX password:
passwd: all authentication tokens updated successfully.
Since the prerequisites are already installed as part of our Linux installation we will skip that for now. The clusterware installation might ask for some more pre-requisites but it will provide a fix script to automatically change the values so we can go ahead here.
Let us create the required directories so that when we clone this VM, the second node also will already have these ready.
[root@dbhost1 ~]# mkdir -p /app/oracle
[root@dbhost1 ~]# mkdir -p /app/12.1.0/grid
[root@dbhost1 ~]# chown grid:dba /app
[root@dbhost1 ~]# chown grid:dba /app/oracle
[root@dbhost1 ~]# chown grid:dba /app/12.1.0
[root@dbhost1 ~]# chown grid:dba /app/12.1.0/grid
[root@dbhost1 ~]# chmod -R g+w /app
Now let us create the mount points. Here we will mount the shared file system on both nodes. For now just create these files. The shared file system will be created in later step.
[root@dbhost1 ~]# mkdir /u01
[root@dbhost1 ~]# mkdir /u02
[root@dbhost1 ~]# mkdir /u03
[root@dbhost1 ~]# chown grid:dba /u01
[root@dbhost1 ~]# chown grid:dba /u02
[root@dbhost1 ~]# chown grid:dba /u03
[root@dbhost1 ~]# chmod g+w /u01
[root@dbhost1 ~]# chmod g+w /u02
[root@dbhost1 ~]# chmod g+w /u03
This concludes the prerequisite steps to prepare basic Linux VM for RAC. In next steps we will clone this VM and then create node 2 for RAC.
Next: Copy/clone this virtual machine to create second node and modify host details
1. Create Virtual Machine and install 64 bit Linux
2. Add additional virtual Ethernet card and perform prerequisites in Linux
3. Copy/clone this virtual machine to create second node and modify host details
4. Setup shared file system and other pre-requisites
5. Install Oracle Grid Infrastructure
6. Install Oracle Database software and create RAC database
Recent Comments