Installing 12c RAC on Linux VM: Install Oracle Database software and create RAC database
Previous: Install Oracle Grid Infrastructure
You can start database installation from <stage>/database directory as follows. Make sure to use database owner user oracle.
[oracle@dbhost1 ~]$ cd /mnt/hgfs/Setup/database/
[oracle@dbhost1 database]$ ./runInstaller
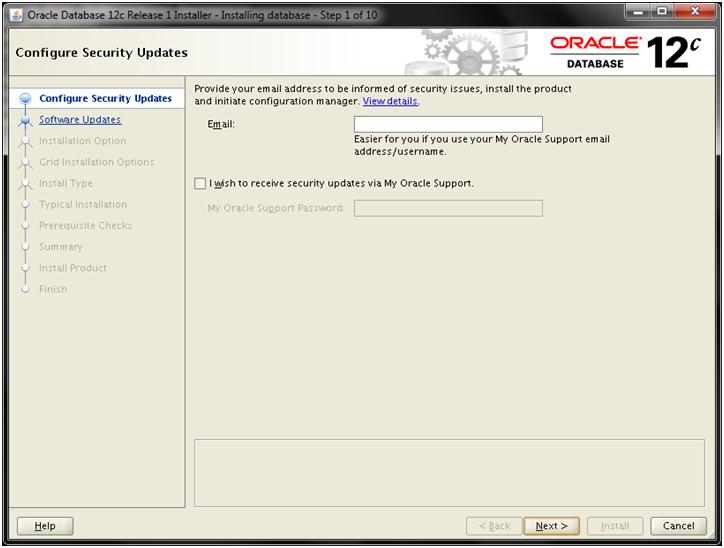
Deselect the checkbox and click Next
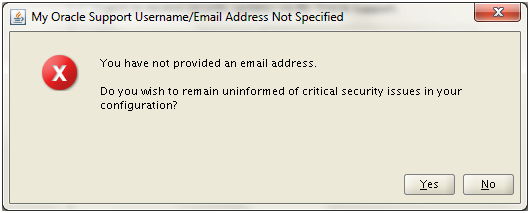
Click Yes
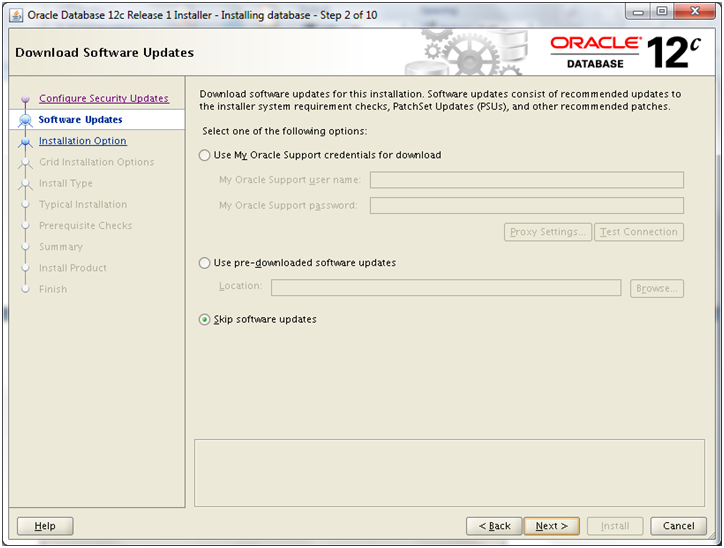
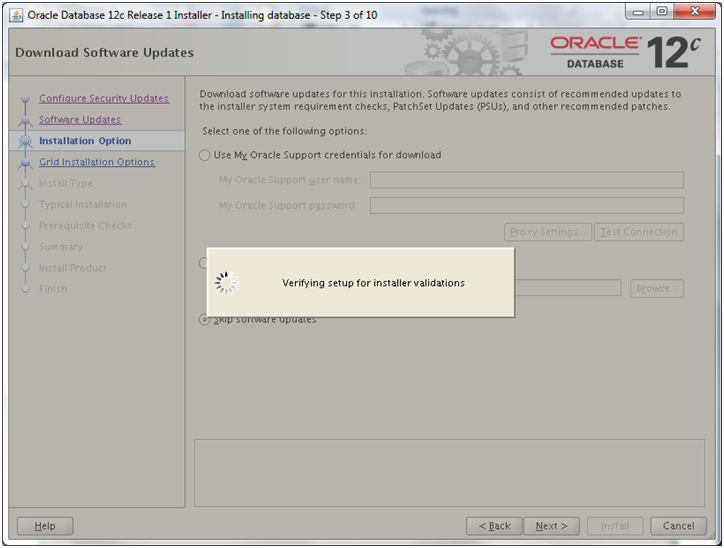
Select “Skip software updates” and click Next
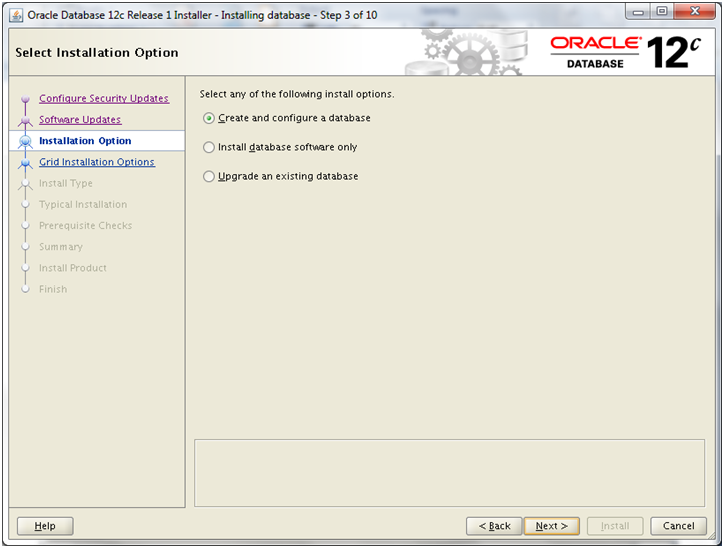
Select “Create and configure a database“. We can also install database software and later create database using DBCA. But here we will choose to create database as well. Click Next
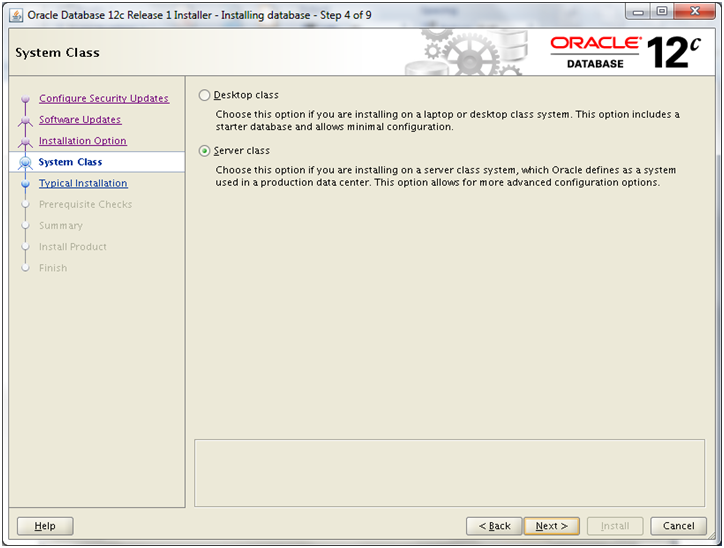
Select “Server class” and click Next
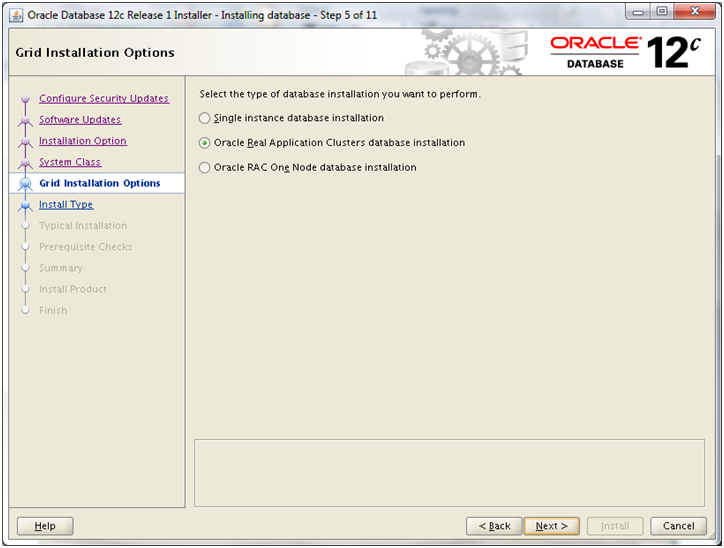
Select “Oracle Real Application Clusters database installation” and click Next

Select “Admin managed” and click Next
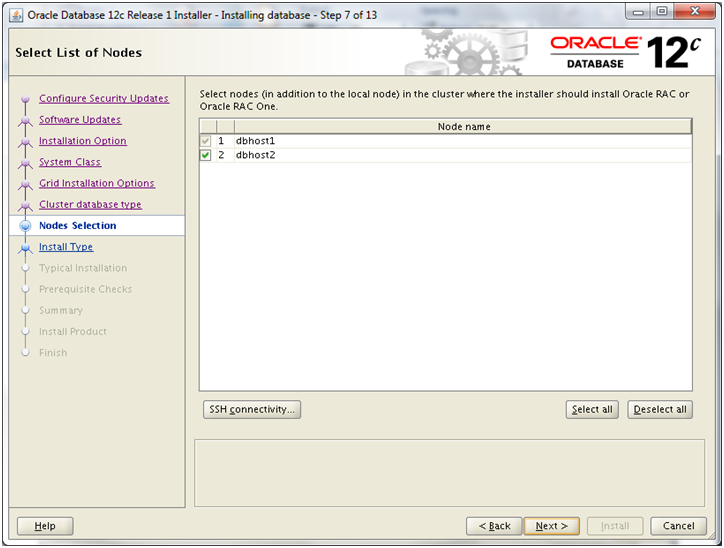
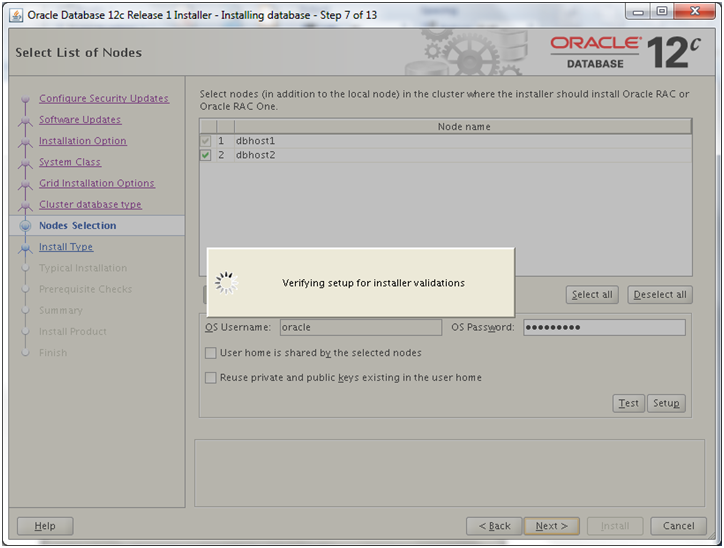
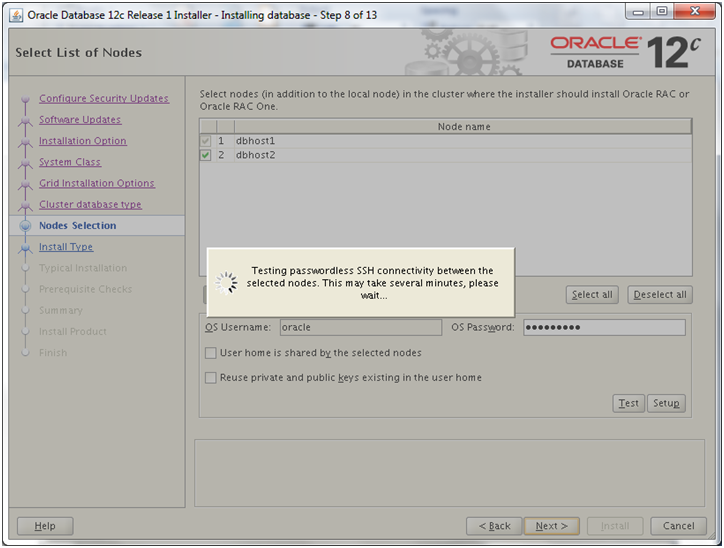
Make sure to select both nodes. Click “SSH connectivity“.
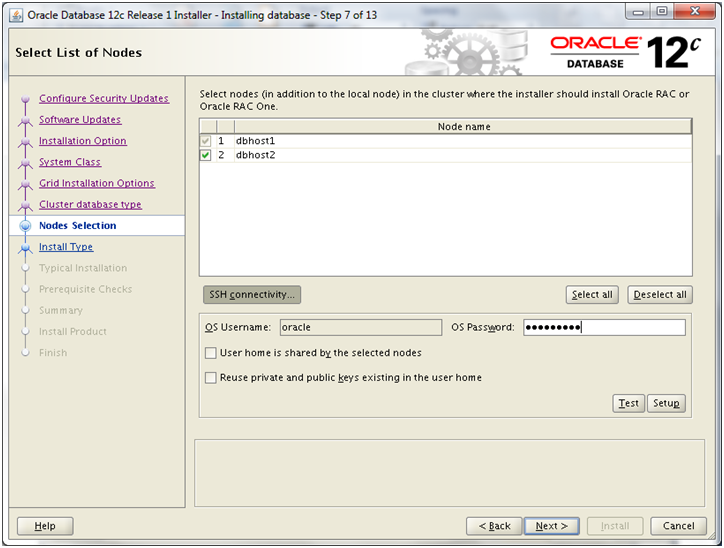
Click Test
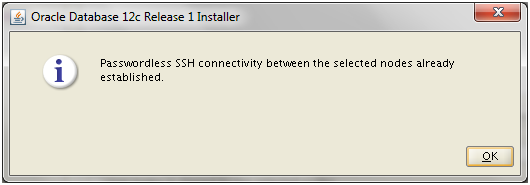
This confirms that passwordless ssh is setup between both nodes with oracle user. Click OK
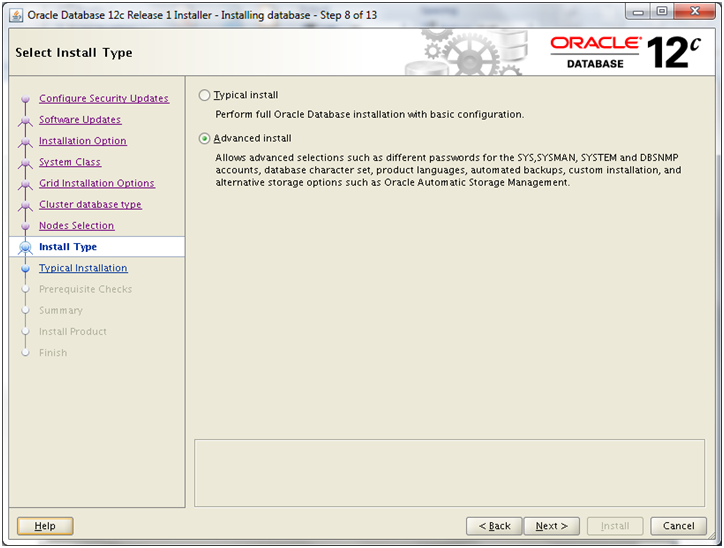
Select “Advanced install” and click Next
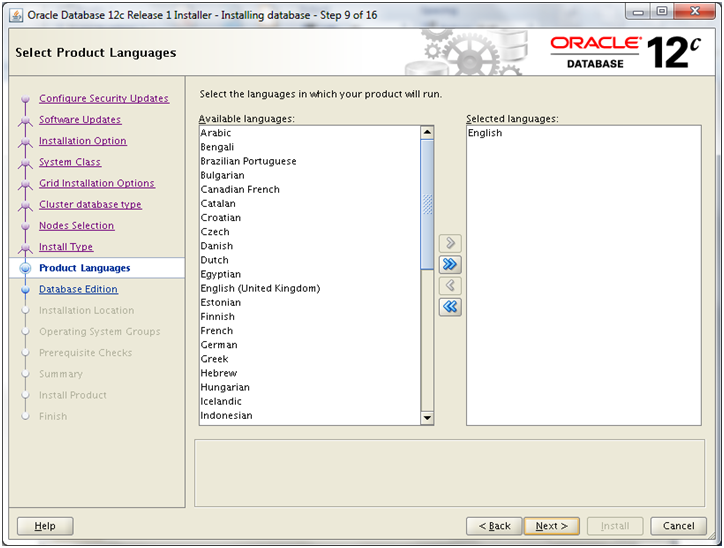
Click Next
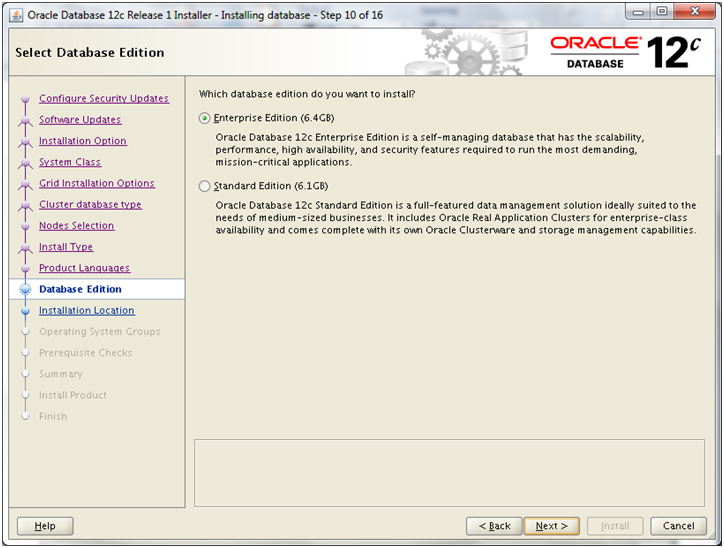
Select “Enterprise Edition” and click Next
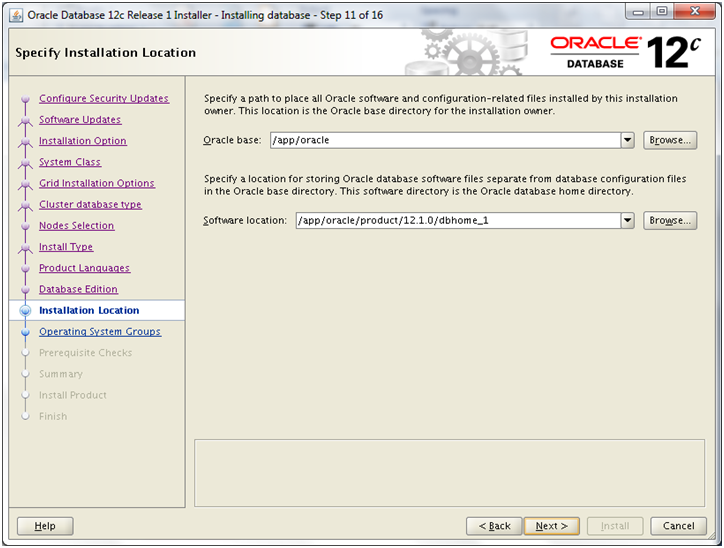
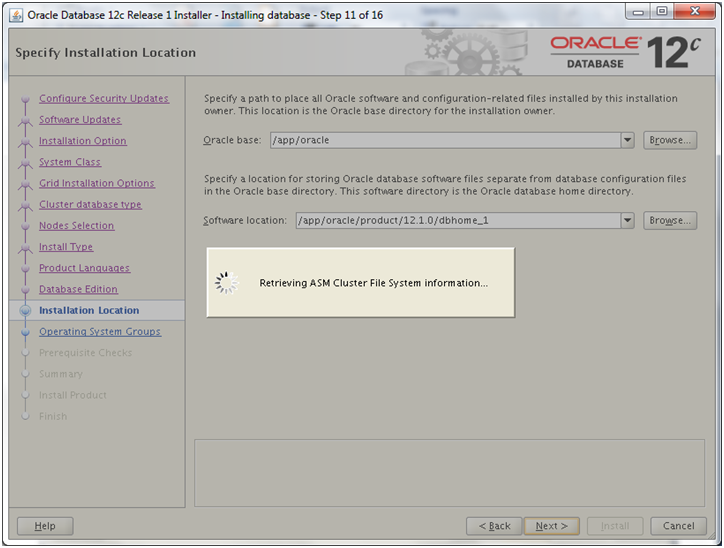
Select Oracle base as above and click Next
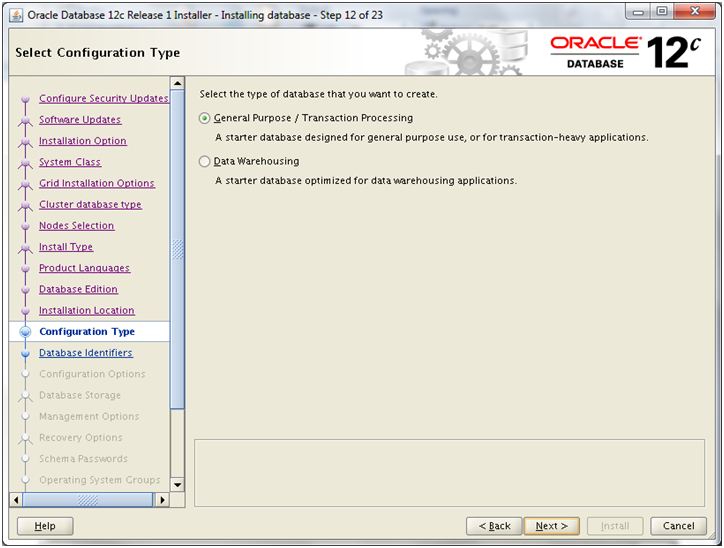
Select “General purpose” and click Next
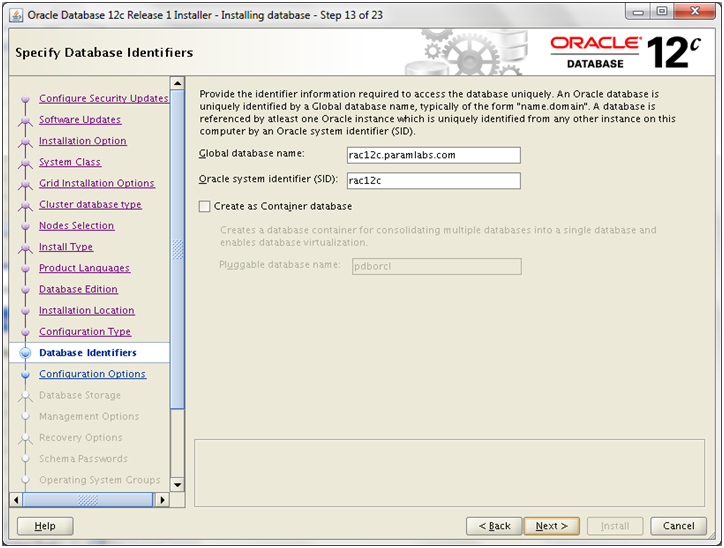
Enter Global database name as “rac12c.paramlabs.com” or whichever desired name and click Next
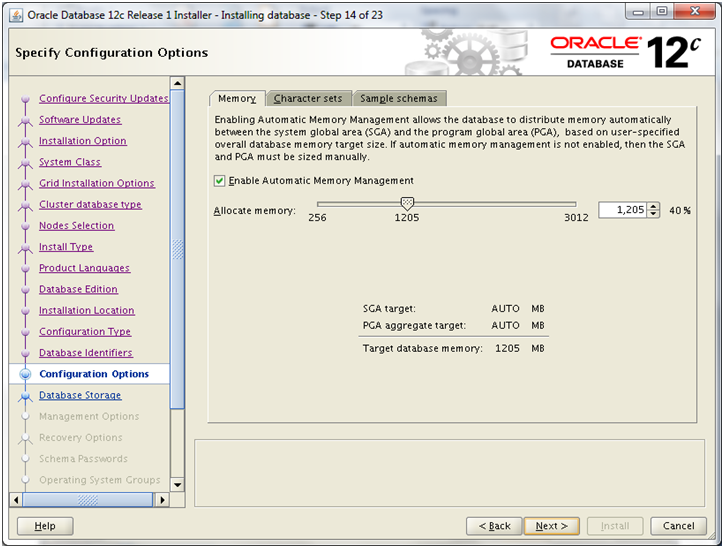
Select appropriate total memory to be assigned. Click on “Character sets” tab
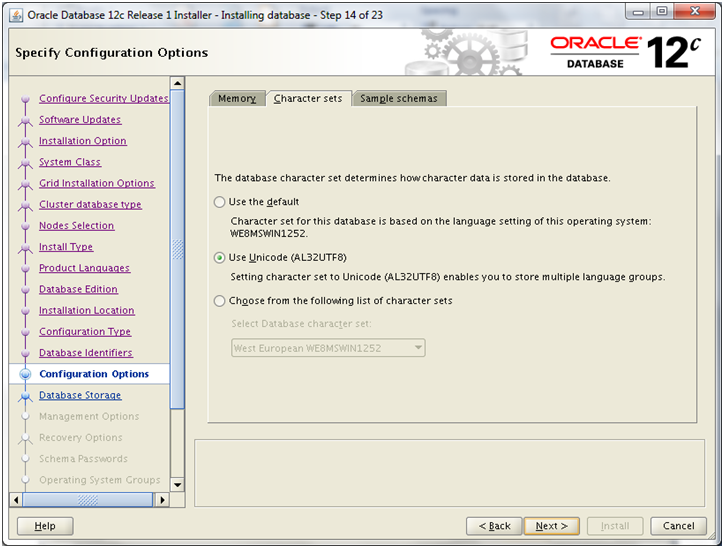
Select “Unicode” and click Next
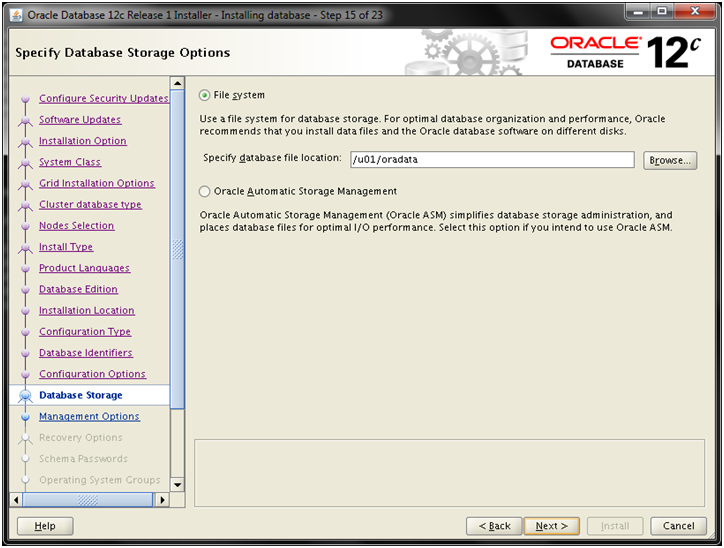
Select “File system” and enter value as “/u01/oradata”. Click Next
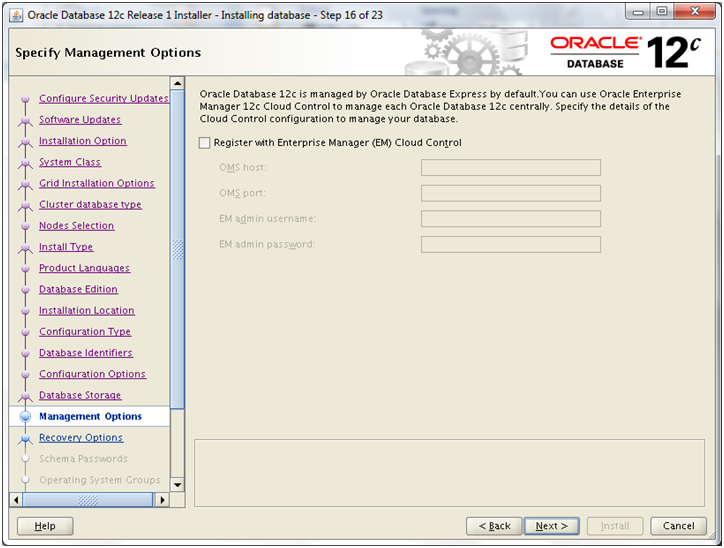
Note: Oracle Enterprise Manager Database Express is always installed and configured by default irrespective of whether you register Oracle Enterprise Manager Cloud Control.
Since we do not have 12c Cloud control yet, we have kept it unchecked. If you have one then provide details here and click Next
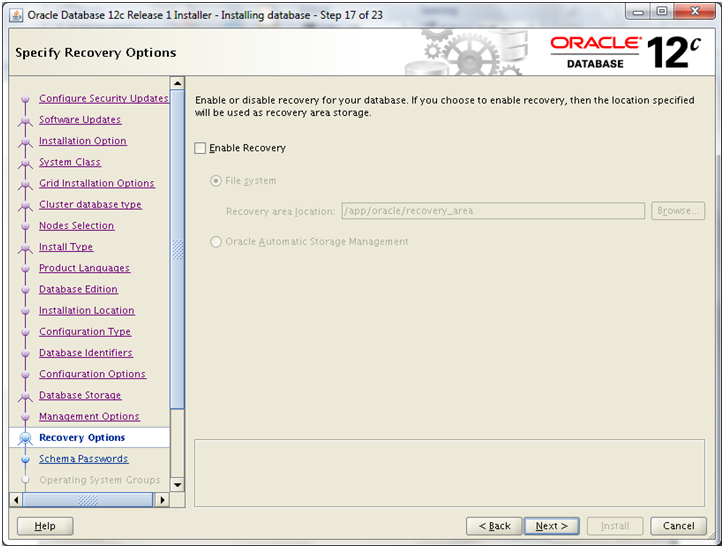
Since this is only for testing, we are deselecting recovery. If required then check this. Click Next

We are entering same password for all users here to keep everything simple. Click Next
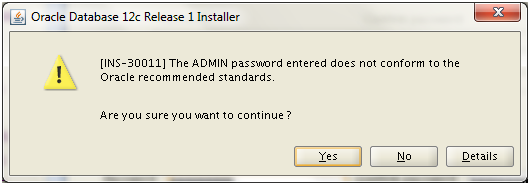
Click Yes
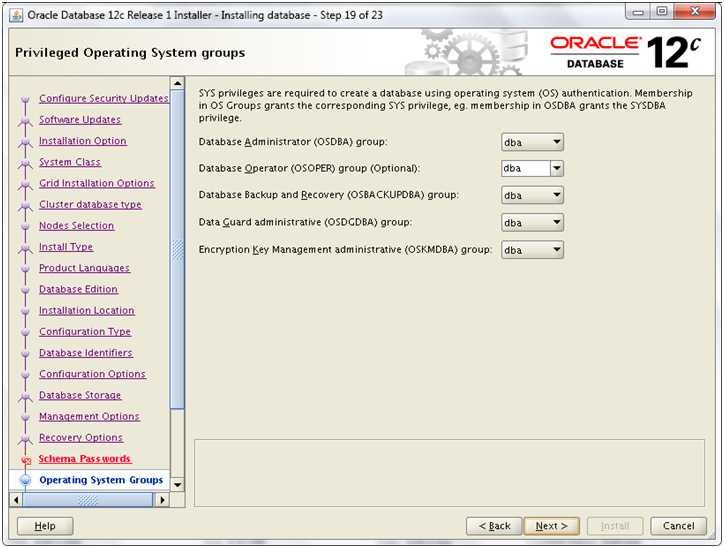
Select appropriate groups but here we are using only “dba” group. Click Next
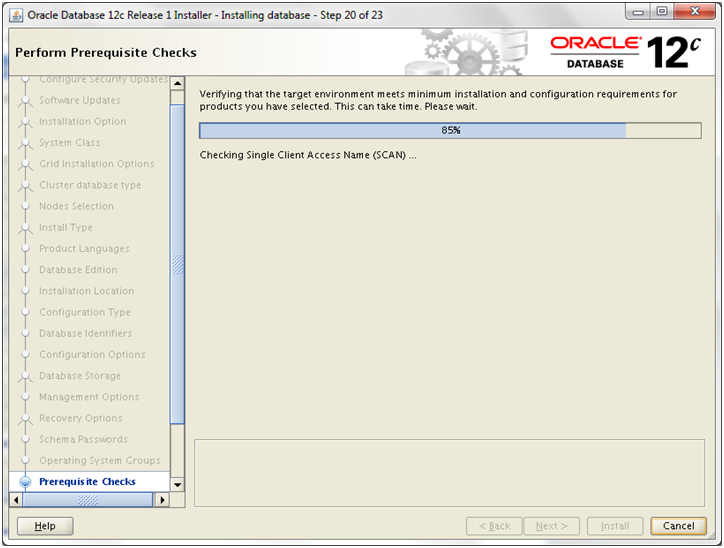
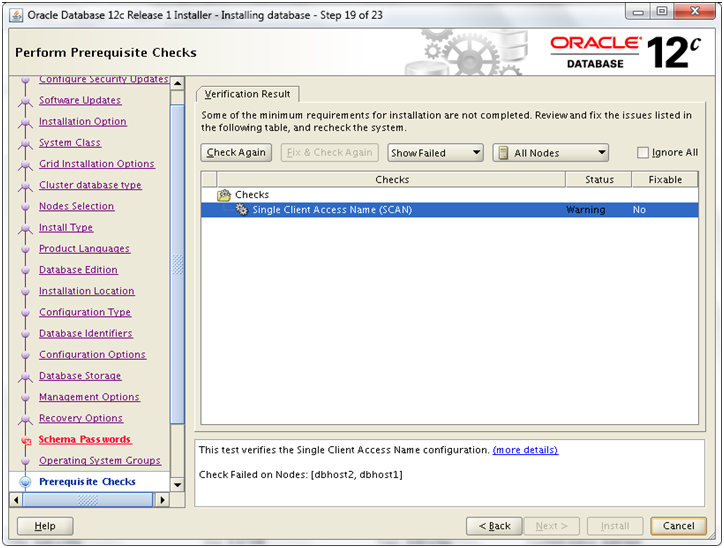
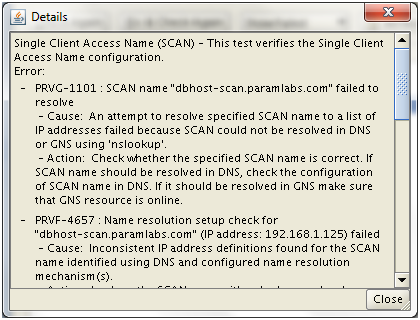
The error for SCAN is since we are not using DNS. We can manually make sure that SCAN is reachable from both nodes.
===================
[root@dbhost1 ~]# ping -c 1 dbhost-scan.paramlabs.com
PING dbhost-scan.paramlabs.com (192.168.1.125) 56(84) bytes of data.
64 bytes from dbhost-scan.paramlabs.com (192.168.1.125): icmp_seq=1 ttl=64 time=0.044 ms
— dbhost-scan.paramlabs.com ping statistics —
1 packets transmitted, 1 received, 0% packet loss, time 0ms
rtt min/avg/max/mdev = 0.044/0.044/0.044/0.000 ms
[root@dbhost2 ~]# ping -c 1 dbhost-scan.paramlabs.com
PING dbhost-scan.paramlabs.com (192.168.1.125) 56(84) bytes of data.
64 bytes from dbhost-scan.paramlabs.com (192.168.1.125): icmp_seq=1 ttl=64 time=0.498 ms
— dbhost-scan.paramlabs.com ping statistics —
1 packets transmitted, 1 received, 0% packet loss, time 0ms
rtt min/avg/max/mdev = 0.498/0.498/0.498/0.000 ms
===================
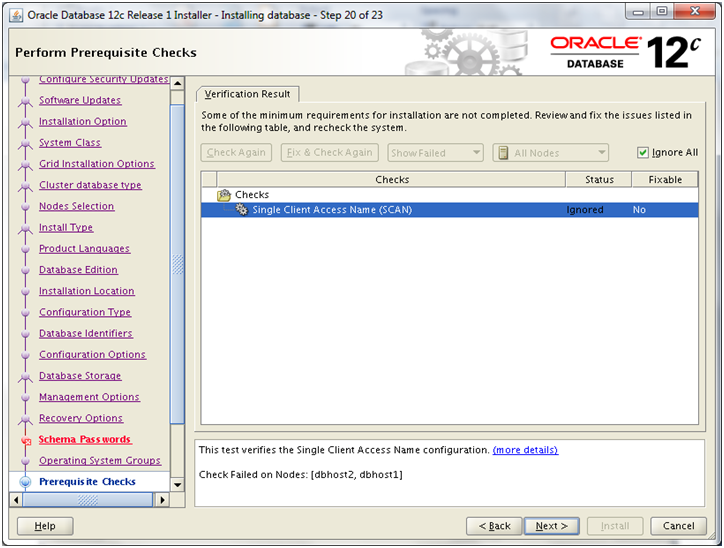
Click “Ignore All” to ignore this error. Click Next
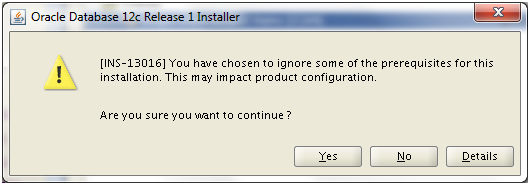
Click Yes
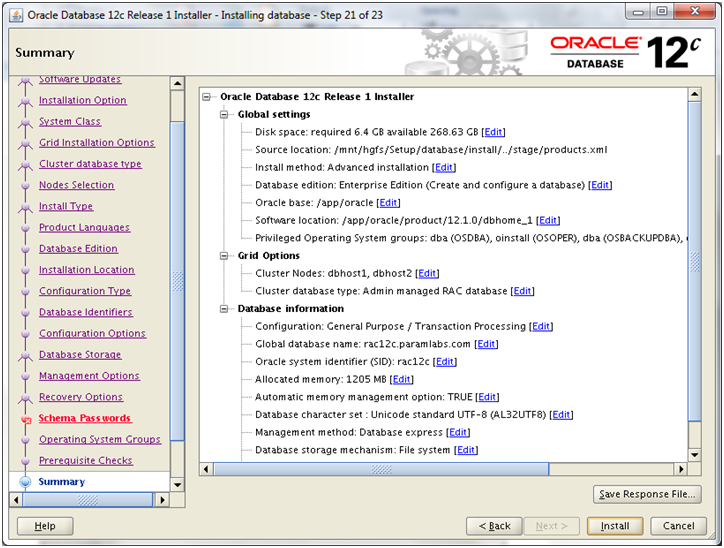
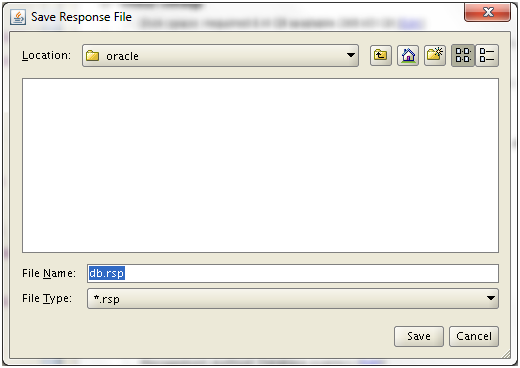
Save Response file if required and click “Install” to start installation
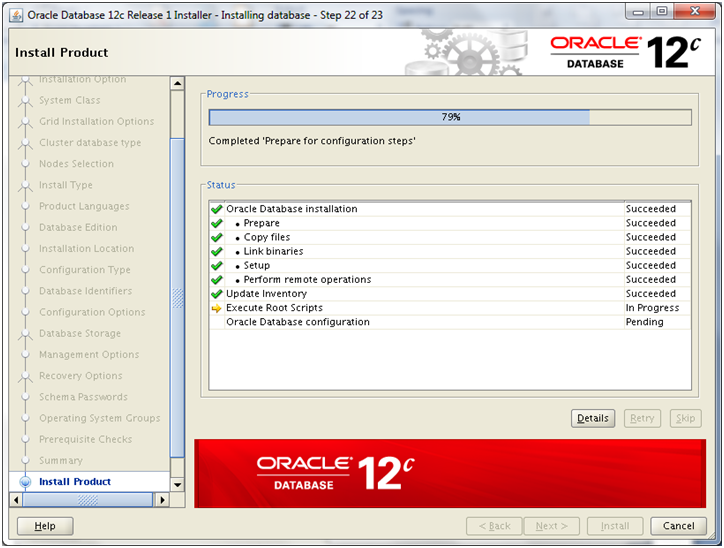
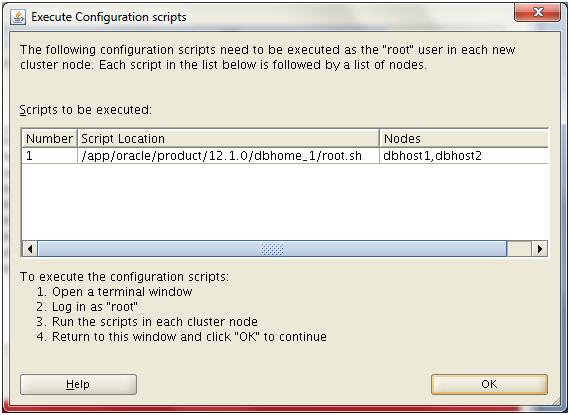
It will prompt us to execute above script as root user on both nodes manually.
[root@dbhost1 ~]# /app/oracle/product/12.1.0/dbhome_1/root.sh
Performing root user operation for Oracle 12c
The following environment variables are set as:
ORACLE_OWNER= oracle
ORACLE_HOME= /app/oracle/product/12.1.0/dbhome_1
Enter the full pathname of the local bin directory: [/usr/local/bin]:
The contents of “dbhome” have not changed. No need to overwrite.
The contents of “oraenv” have not changed. No need to overwrite.
The contents of “coraenv” have not changed. No need to overwrite.
Entries will be added to the /etc/oratab file as needed by
Database Configuration Assistant when a database is created
Finished running generic part of root script.
Now product-specific root actions will be performed.
[root@dbhost2 ~]# /app/oracle/product/12.1.0/dbhome_1/root.sh
Performing root user operation for Oracle 12c
The following environment variables are set as:
ORACLE_OWNER= oracle
ORACLE_HOME= /app/oracle/product/12.1.0/dbhome_1
Enter the full pathname of the local bin directory: [/usr/local/bin]:
The contents of “dbhome” have not changed. No need to overwrite.
The contents of “oraenv” have not changed. No need to overwrite.
The contents of “coraenv” have not changed. No need to overwrite.
Entries will be added to the /etc/oratab file as needed by
Database Configuration Assistant when a database is created
Finished running generic part of root script.
Now product-specific root actions will be performed.
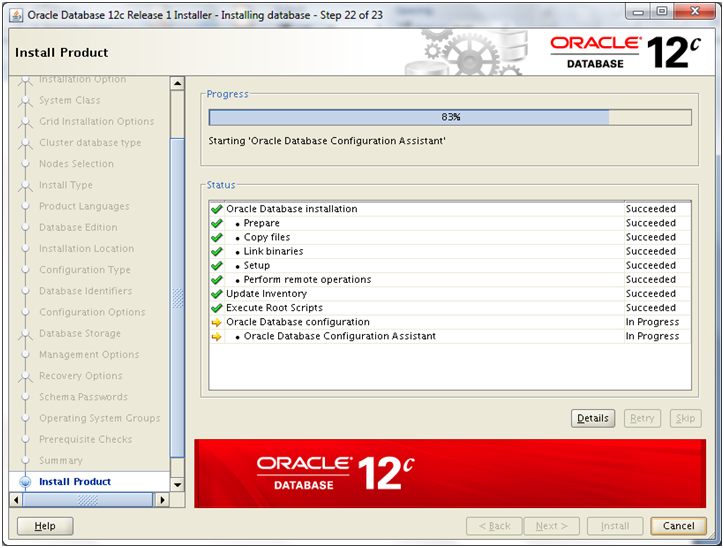
Now it will automatically launch the database configuration assistant since we selected option of creating database as well.
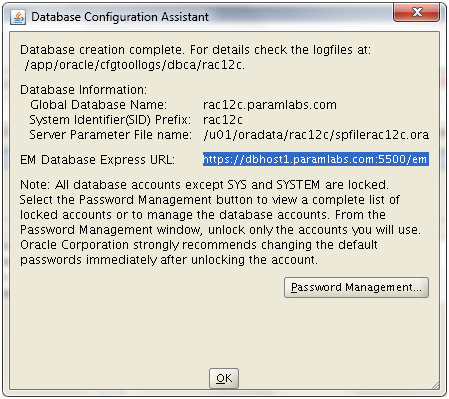
Above is the summary screen. Make a note of EM database “Express” URL for future reference.
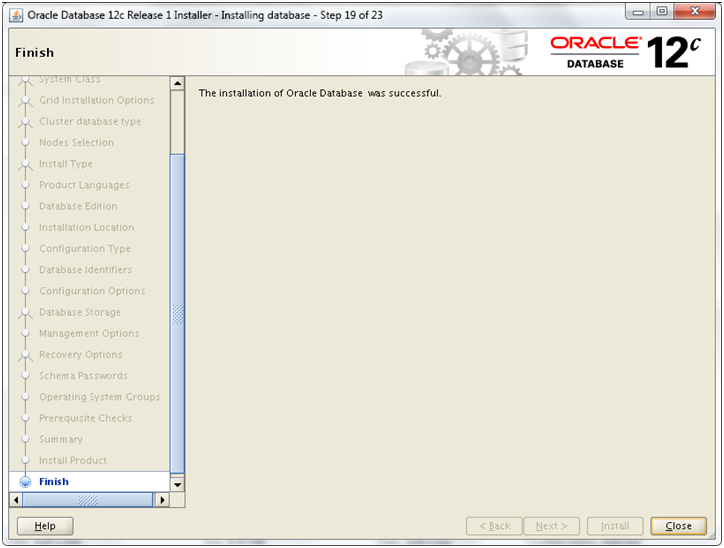
Click Close to finish the installation.
Let us make sure if database is registered and started properly.
[oracle@dbhost1 database]$ export ORACLE_HOME=/app/oracle/product/12.1.0/dbhome_1
[oracle@dbhost1 database]$ export PATH=$ORACLE_HOME/bin:$PATH
[oracle@dbhost1 database]$ export ORACLE_SID=rac12c1
[oracle@dbhost1 database]$ srvctl status database -d rac12c
Instance rac12c1 is running on node dbhost1
Instance rac12c2 is running on node dbhost2
[oracle@dbhost1 database]$ sqlplus / as sysdba
Connected to:
Oracle Database 12c Enterprise Edition Release 12.1.0.1.0 – 64bit Production
With the Partitioning, Real Application Clusters, OLAP, Advanced Analytics
and Real Application Testing options
SQL> select instance_name, status from gv$instance;
INSTANCE_NAME STATUS
—————- ————
rac12c1 OPEN
rac12c2 OPEN
This concludes 12c RAC database installation. A lot of new posts will come soon where we will discuss the new features, tips and tricks of 12c. Also a new set of trainings will be introduced for 12c as we explore 12c in more details.
Happy learning !
Tushar
1. Create Virtual Machine and install 64 bit Linux
2. Add additional virtual Ethernet card and perform prerequisites in Linux
3. Copy/clone this virtual machine to create second node and modify host details
4. Setup shared file system and other pre-requisites
5. Install Oracle Grid Infrastructure
6. Install Oracle Database software and create RAC database
Recent Comments