Run Oracle Fusion Applications Repository Creation Utility (Applications RCU)
Installing Oracle Fusion Applications > Setting up Fusion Applications Node > Run Oracle Fusion Applications Repository Creation Utility (Applications RCU)
Previous: Install Oracle 11g Database (Fusion Apps Database)
Pro Oracle Fusion Applications – Installation and Administration
Now you can buy the first and only comprehensive book on Oracle Fusion Applications Installation and Administration which covers end to end information on introduction, planning, installation and troubleshooting guides for implementing Fusion Applications on premise. Buy it now from any of the following stores.
http://www.amazon.com/Pro-Oracle-Fusion-Applications-Administration/dp/1484209842
http://www.barnesandnoble.com/w/pro-oracle-fusion-applications-tushar-thakker/1121094340
Please note that RCU are available only for Windows and Linux platforms. Hence we may need to run the RCU on Windows or Linux machine which can connect to this database.
Fusion Applications stage has both Applications and Fusion Middleware RCUs for Linux but for Windows only Apps RCU is included in the installer.
We will go ahead with Linux RCU here.
For Linux, the RCU is included in repository_location/installers/apps_rcu location.
Create a directory on physical partition and call it APPS_RCU_HOME
[fusion@fahost dbs]$ mkdir /app/fusion/provisioning/apps_rcu
Go to repository_location/installers/apps_rcu and locate the rcuHome_fusionapps_linux.zip file. This file was staged when you created the installer repository.
Extract the contents of rcuHome_fusionapps_linux.zip to a directory (APPS_RCU_HOME) on the database server. All dependent components that Applications RCU needs are included in this zipped file.
[fusion@fahost dbs]$ cd /app/fusion/provisioning/apps_rcu
[fusion@fahost apps_rcu]$ unzip /stage/installers/apps_rcu/linux/rcuHome_fusionapps_linux.zip
Create a temporary directory on the database server. Make a note of the location. You will need to enter this location when you specify a value for FUSIONAPPS_DBINSTALL_DP_DIR
[fusion@fahost apps_rcu]$ mkdir /app/fusion/provisioning/apps_rcu/dp_dir
Locate and copy APPS_RCU_HOME/rcu/integration/fusionapps/export_fusionapps_dbinstall.zip to the directory you specified for FUSIONAPPS_DBINSTALL_DP_DIR.
Unzip export_fusionapps_dbinstall.zip to FUSIONAPPS_DBINSTALL_DP_DIR.
[fusion@fahost apps_rcu]$ cd /app/fusion/provisioning/apps_rcu/dp_dir
[fusion@fahost dp_dir]$ unzip /app/fusion/provisioning/apps_rcu/rcu/integration/fusionapps/export_fusionapps_dbinstall.zip
Archive: /app/fusion/provisioning/apps_rcu/rcu/integration/fusionapps/export_fusionapps_dbinstall.zip
inflating: fusionapps_dbinstall_latest_06.dmp
inflating: fusionapps_dbinstall_latest_02.dmp
inflating: fusionapps_dbinstall_latest_07.dmp
inflating: fusionapps_dbinstall_latest_04.dmp
inflating: fusionapps_dbinstall_latest_03.dmp
inflating: fusionapps_dbinstall_latest_01.dmp
inflating: fusionapps_dbinstall_latest_05.dmp
inflating: fusionapps_dbinstall_latest_08.dmp
Go to APPS_RCU_HOME/rcu/integration/biapps/schema and locate the otbi.dmp file. Copy otbi.dmp to FUSIONAPPS_DBINSTALL_DP_DIR (where you unzipped the contents of export_fusionapps_dbinstall.zip)
[fusion@fahost dp_dir]$ cp -p /app/fusion/provisioning/apps_rcu/rcu/integration/biapps/schema/otbi.dmp .
Launch Repository Creation Utility (RCU)
[fusion@fahost dp_dir]$ cd /app/fusion/provisioning/apps_rcu/bin
[fusion@fahost bin]$ ./rcu
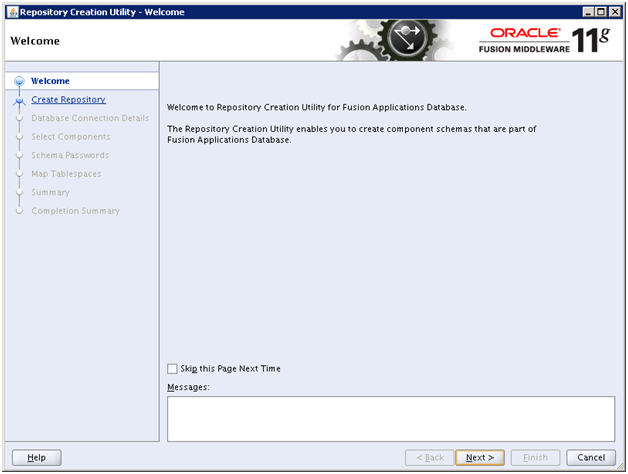
Click Next
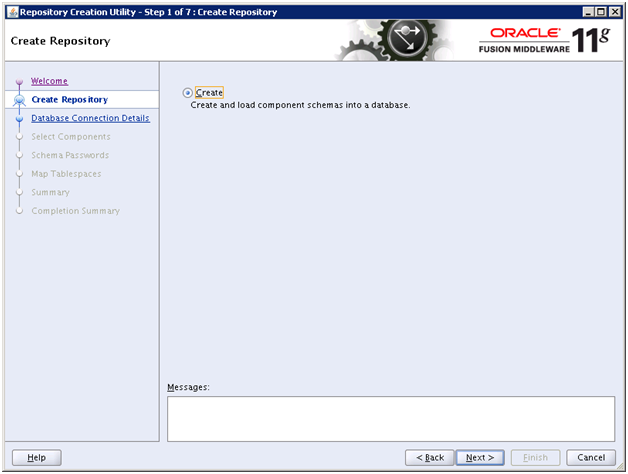
Click Next
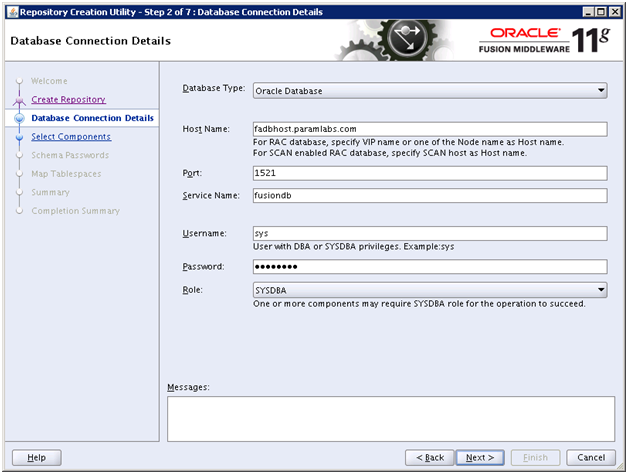
Enter details of the Fusion Apps database created in previous step. Click Next
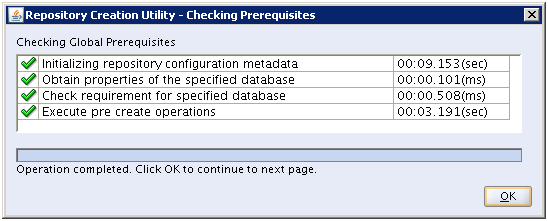
Once prerequisite check completes, click OK
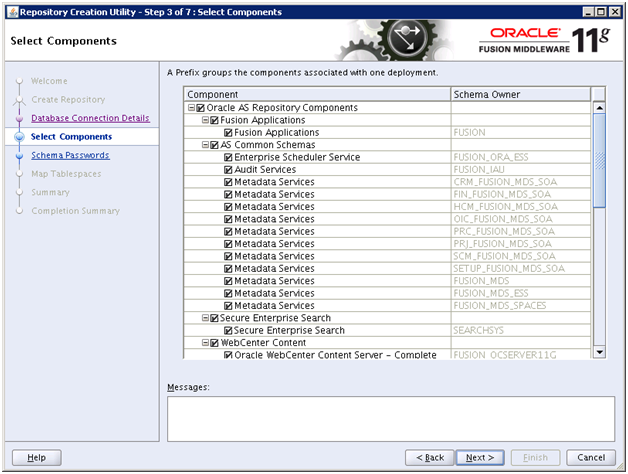
Select ALL components and click Next
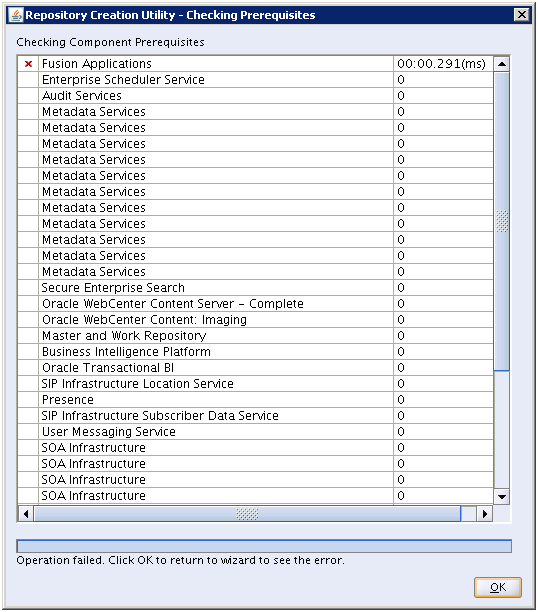
If you had reduced SGA/PGA/Memory size in previous step then you might get an error. Click OK to see the error.
The error is as follows.
RCU-6107:DB Init Param Prerequisite failure for: pga_aggregate_target
Current Value is 0. It should be greater than or equal to 4294967296.
RCU-6107:DB Init Param Prerequisite failure for: sga_target
Current Value is 0. It should be greater than or equal to 9663676416.
To fix this issue, we need to modify the minimum requirement of SGA and PGA in installer pre-requisite config file located at apps_rcu /rcu/integration/fusionapps/fusionapps.xml
[fusion@fahost ~]$ cp -p /app/fusion/provisioning/apps_rcu/rcu/integration/fusionapps/fusionapps.xml /app/fusion/provisioning/apps_rcu/rcu/integration/fusionapps/fusionapps.xml.bak
Edit the file as follows
[fusion@fahost ~]$ vi /app/fusion/provisioning/apps_rcu/rcu/integration/fusionapps/fusionapps.xml
<DBPrerequisite COMPARE_OPERATOR=”GE” DATA_TYPE=”NUMBER” PREREQ_TYPE=”InitParameter”>
<ValidIf DBTYPE=”ORACLE”/>
<PrereqIdentifier>sga_target</PrereqIdentifier>
<PrereqValue>0</PrereqValue>
</DBPrerequisite>
…
<DBPrerequisite COMPARE_OPERATOR=”GE” DATA_TYPE=”NUMBER” PREREQ_TYPE=”InitParameter”>
<ValidIf DBTYPE=”ORACLE”/>
<PrereqIdentifier>pga_aggregate_target</PrereqIdentifier>
<PrereqValue>0</PrereqValue>
</DBPrerequisite>
[fusion@fahost ~]$ diff /app/fusion/provisioning/apps_rcu/rcu/integration/fusionapps/fusionapps.xml /app/fusion/provisioning/apps_rcu/rcu/integration/fusionapps/fusionapps.xml.bak
111c111
< <PrereqValue>0</PrereqValue>
—
> <PrereqValue>4294967296</PrereqValue>
144c144
< <PrereqValue>0</PrereqValue>
—
> <PrereqValue>9663676416</PrereqValue>
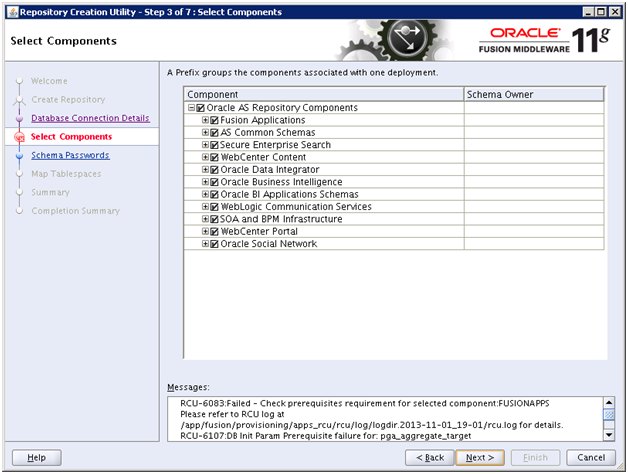
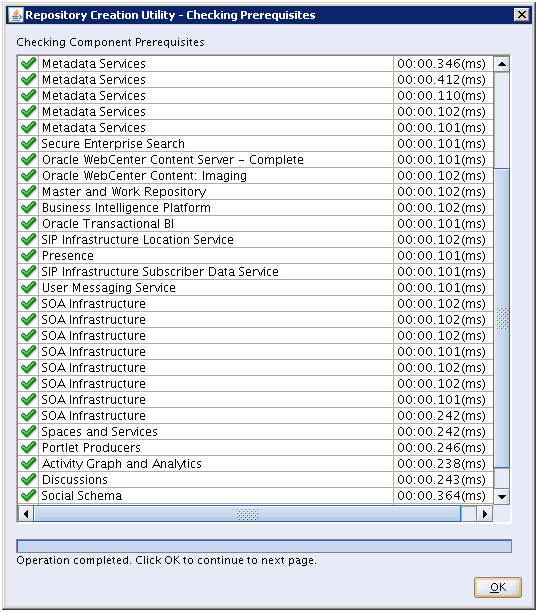
Click “Back” TWICE and click next. The check should be successful now.
Click OK
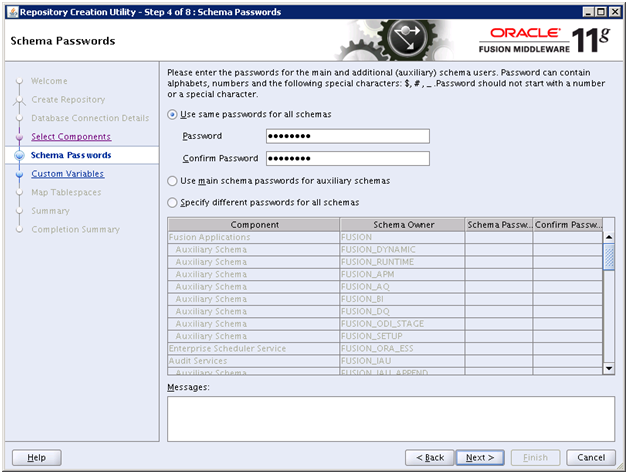
Enter same password (eg. Oracle123) for all schemas and click Next
Open another terminal window. Create following directories for custom environment variables.
[fusion@fahost ~]$ mkdir /app/database/applcp
[fusion@fahost ~]$ mkdir /app/database/appllog
[fusion@fahost ~]$ mkdir /app/database/obieebkp

Specify these above values in the same screen under Fusion Applications Component (expect first value which is the temporary DP directory created before /app/fusion/provisioning/apps_rcu/dp_dir)
Supervisor Password: You must enter the same password you set up as ODI SUPERVISOR in Applications RCU. Since we kept all passwords as Oracle123, nothing much to remember. Enter the same password.
Work Repository Password: Default = None. You must enter the same password set up as ODI SUPERVISOR in Applications RCU.
Oracle Transactional BI : Directory on the database server where Oracle Transactional Business Intelligence import and export files are stored. Enter /app/fusion/provisioning/apps_rcu/dp_dir again.
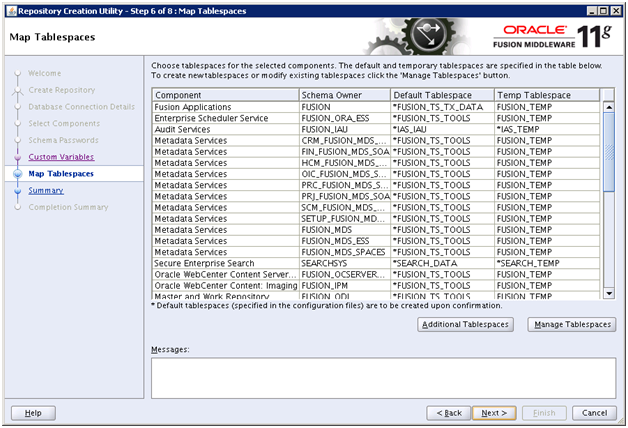
Review the list and click Next
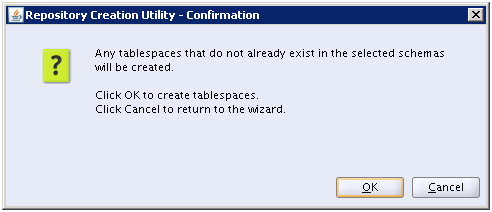
Click OK
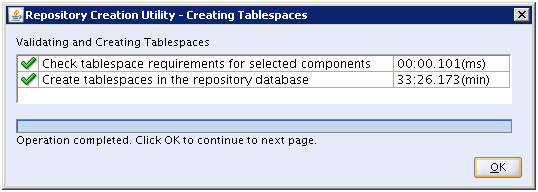
Once tablespaces are created, click OK to proceed with schemas creation.
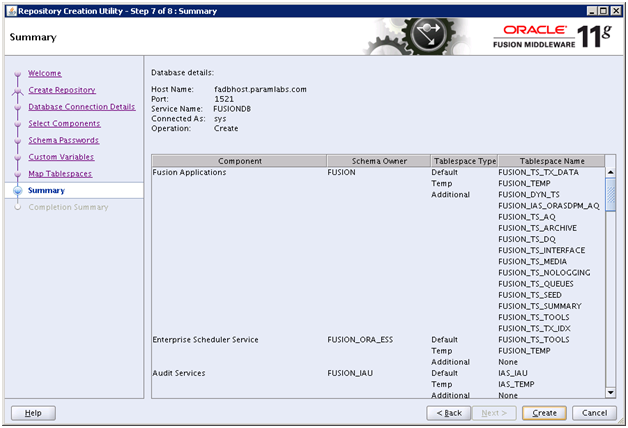
Review the details and click Create to start creating the schemas.
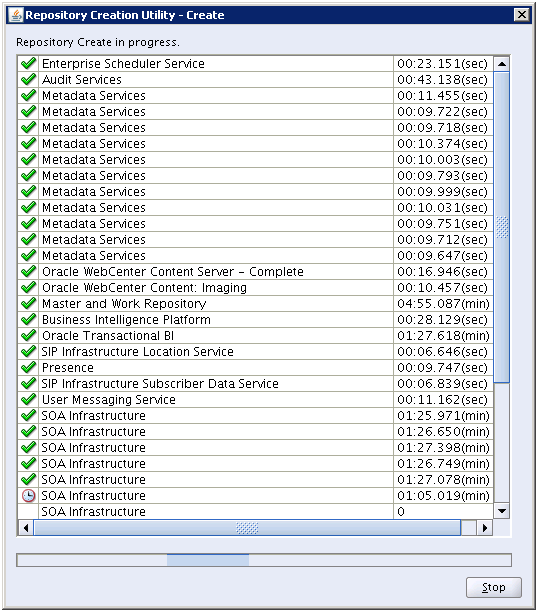
This might take long time depending on the machine configuration.
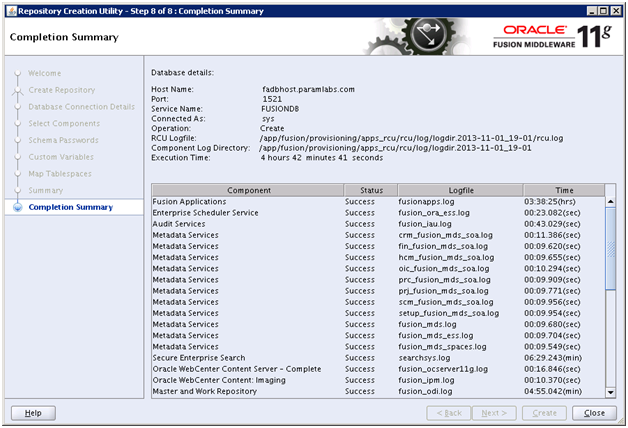
Once completed, review the summary and click Close
Next: Create new Fusion Applications Response File
Installing Oracle Fusion Applications – steps
A. Setting up Identity and Access Management Node
1. Install Fusion Applications Provisioning Framework
2. Install Oracle 11g Database (Identity management database)
3. Run Repository Creation Utility (RCU) for Oracle Identity Management components
4. Install Identity Management Provisioning Wizard
5. Create IDM provisioning Response File
6. Provision Identity Management
7. Perform Post-Provisioning Configuration
B. Setting up Fusion Applications Node
1. Install Fusion Applications Provisioning Framework
2. Install Oracle 11g Database (Fusion Apps Database)
3. Run Oracle Fusion Applications Repository Creation Utility (Applications RCU)
Recent Comments