Create Fusion Applications Response File
Installing Oracle Fusion Applications > Setting up Fusion Applications Node > Create Fusion Applications Response File
Previous: Run Oracle Fusion Applications Repository Creation Utility (Applications RCU)
Pro Oracle Fusion Applications – Installation and Administration
Now you can buy the first and only comprehensive book on Oracle Fusion Applications Installation and Administration which covers end to end information on introduction, planning, installation and troubleshooting guides for implementing Fusion Applications on premise. Buy it now from any of the following stores.
http://www.amazon.com/Pro-Oracle-Fusion-Applications-Administration/dp/1484209842
http://www.barnesandnoble.com/w/pro-oracle-fusion-applications-tushar-thakker/1121094340
In order to create a new fusion applications Response File we should launch the provisioning wizard again from <framework_location>/bin
<framework_location> is same what we mentioned in previous post. i.e. /app/fusion/provisioning
Note: The step which was earlier called “Provisioning Plan” is now called “Response File” since last few releases.
[fusion@fahost ~]$ export JAVA_HOME=/app/fusion/jdk6
[fusion@fahost ~]$ cd /app/fusion/provisioning/bin
[fusion@fahost bin]$ ./provisioningWizard.sh &
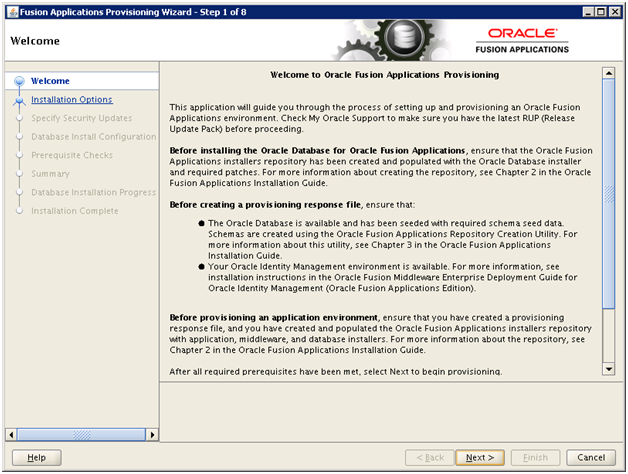
Click Next
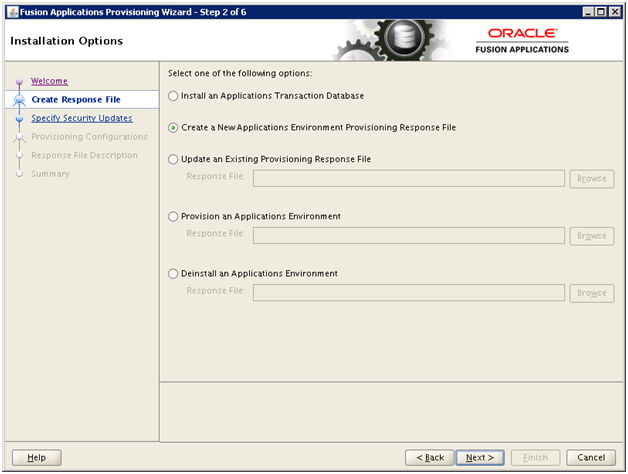
Select “Create a New Applications Environment Provisioning Response File” and click Next
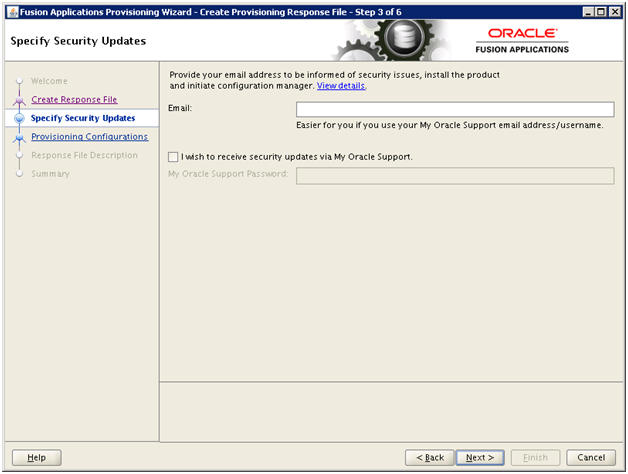
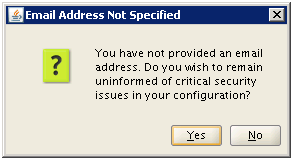
Select email preference and click Next
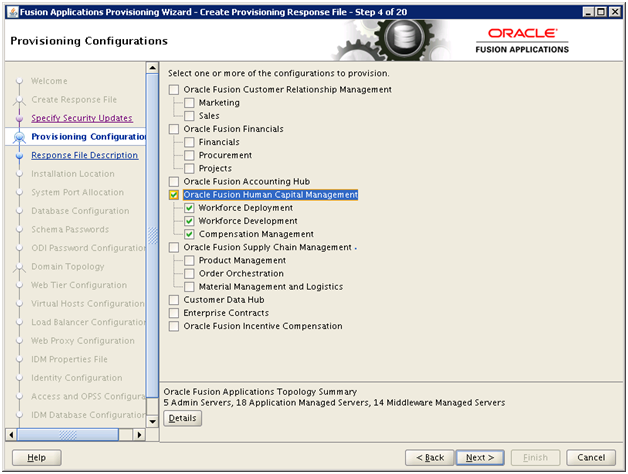
Select the required product to be provisioned. Please note that as on today, you cannot add any new product family after provisioning due to architecture limitation of Fusion Apps.
For more details on this, please look at our following earlier post.
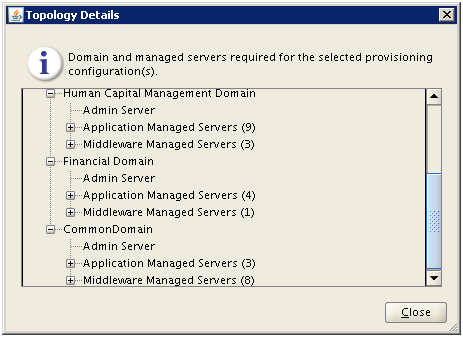
You can also click Details to see how many managed servers are being configured as part of this offering.

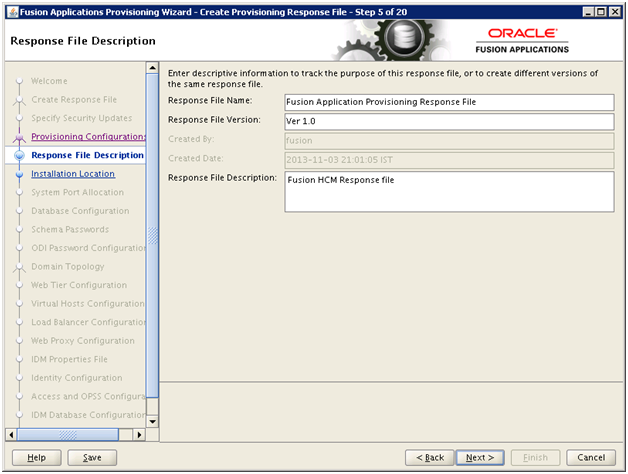
Enter response file name and description and click Next
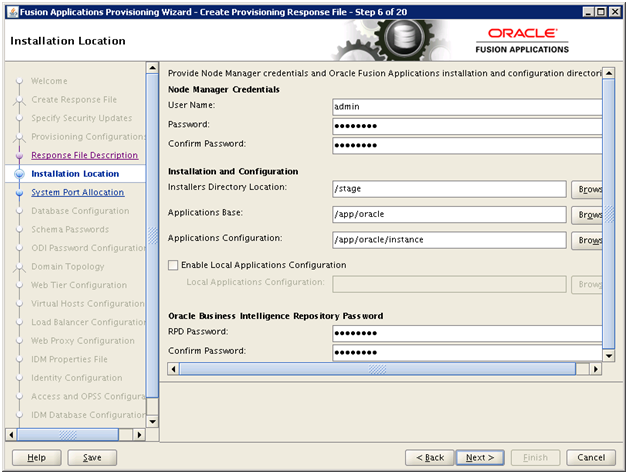
Select a username and password for Node Manager.
Enter the repository source location in Installers directory.
Select Application Base as /app/oracle and let other field be populated automatically.
Select a password for BI repository. We entered Oracle123.
Click Next
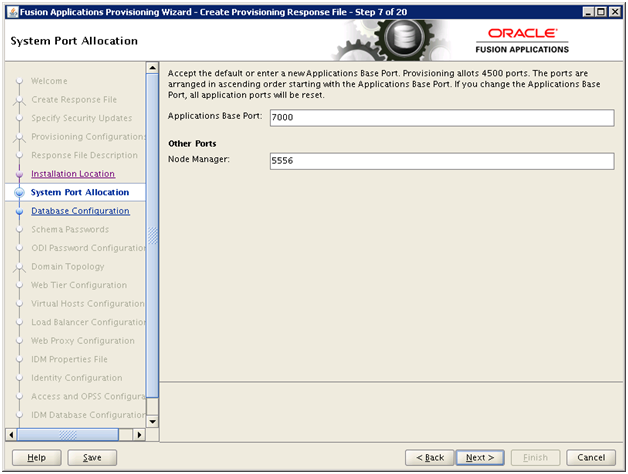
Review the ports and click Next
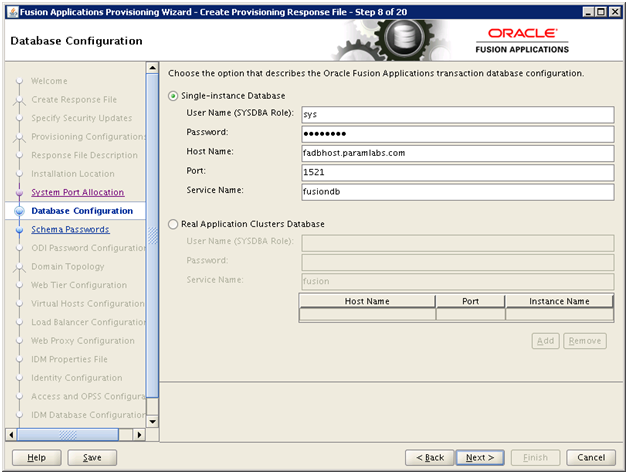
Enter details of “Fusion” database (installed in previous steps) here. Click Next
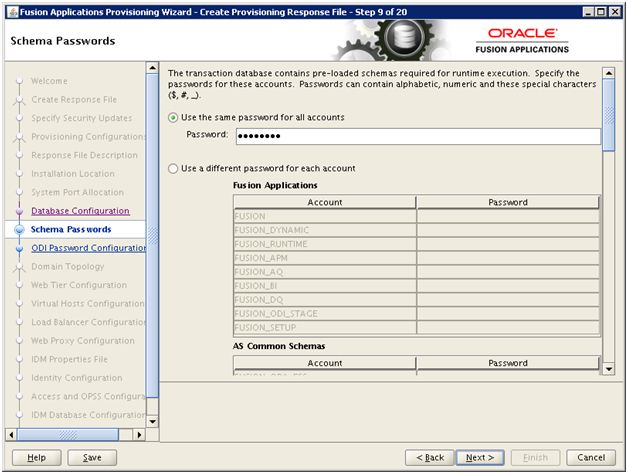
Enter same password for all accounts. e.g. Oracle123 and click Next
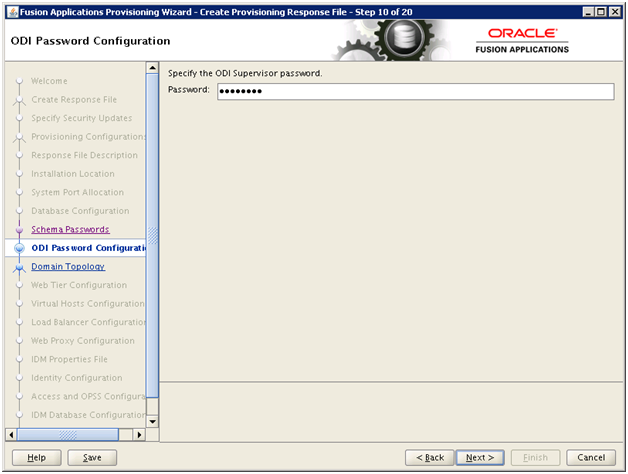
Enter ODI Supervisor account password. Click Next
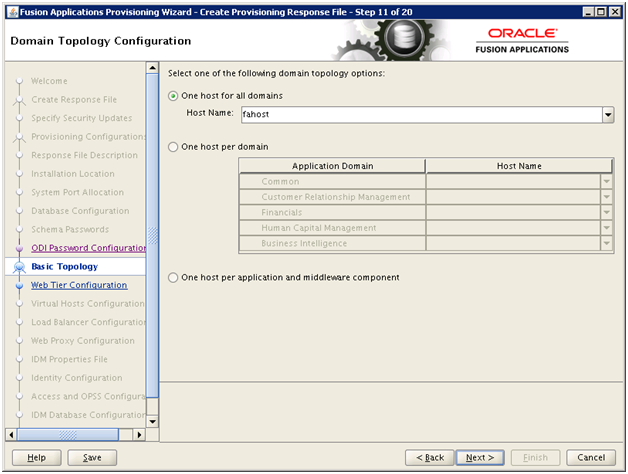
Let’s keep single node “fahost” for our installation. Click Next
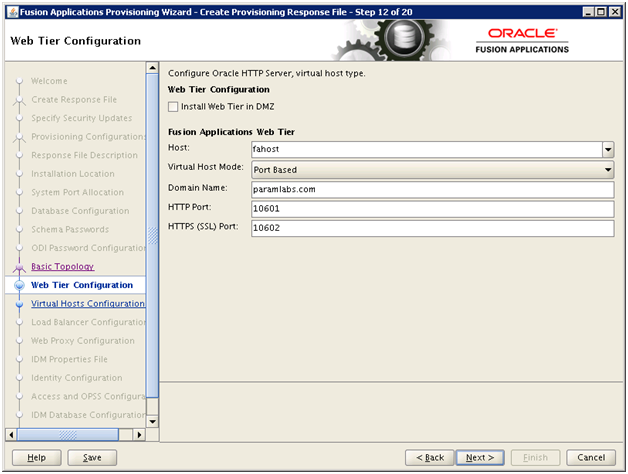
Enter hostname as “fahost” and appropriate domain name.
Since we are not using any load balancer names, we will keep the virtual host mode only port based.
Click Next
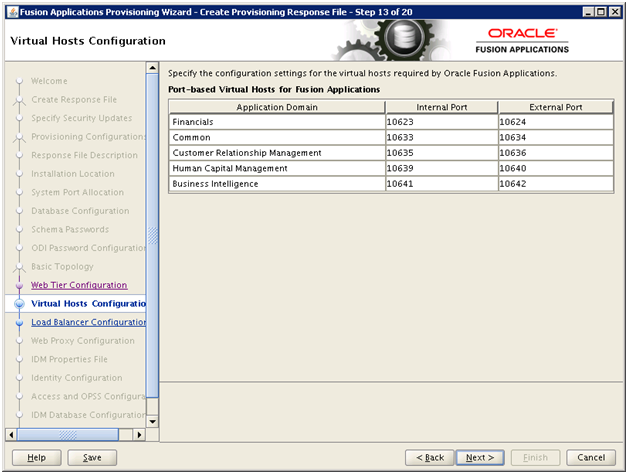
Review the screen and click Next
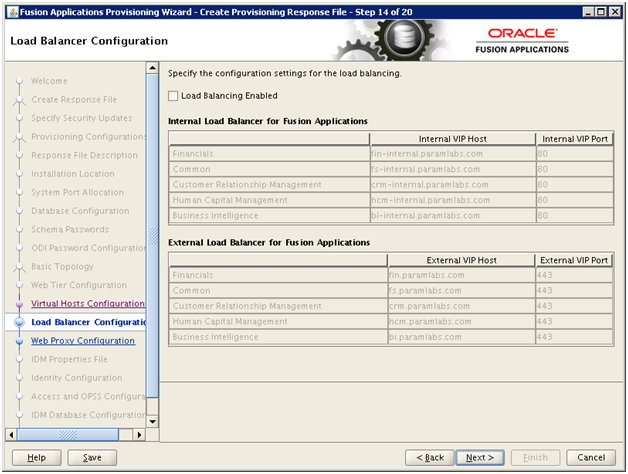
Click Next
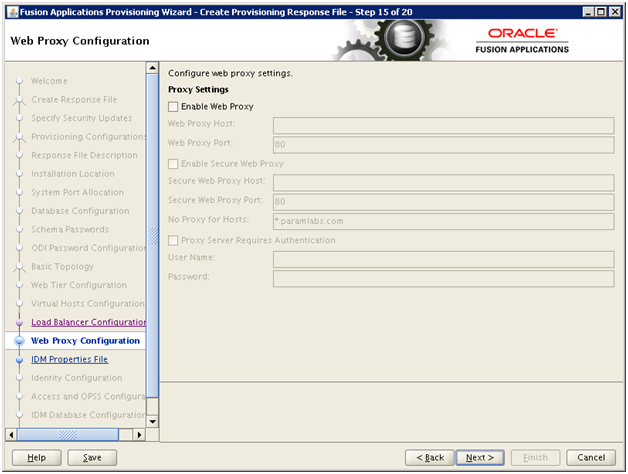
Click Next
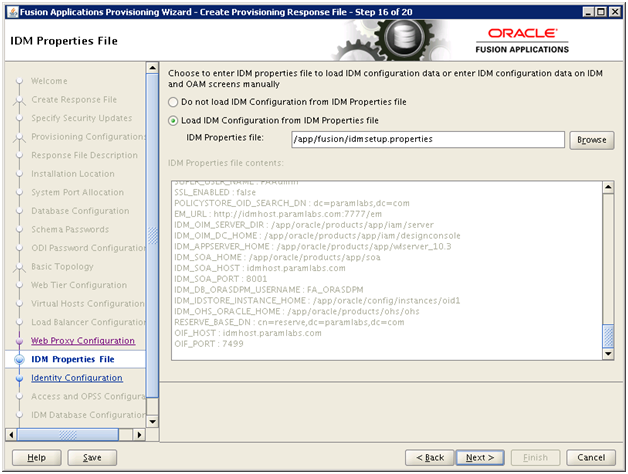
We need to copy the idmsetup.properties file from IDM node to FA node in order to automatically populate next screens.
[fusion@fahost bin]$ cd /app/fusion/
[fusion@fahost fusion]$ scp fusion@idmhost:/app/oracle/config/fa/idmsetup.properties .
Browse for this file once transfer is complete and click Next
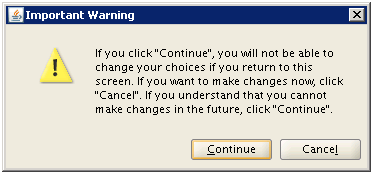
Click Continue
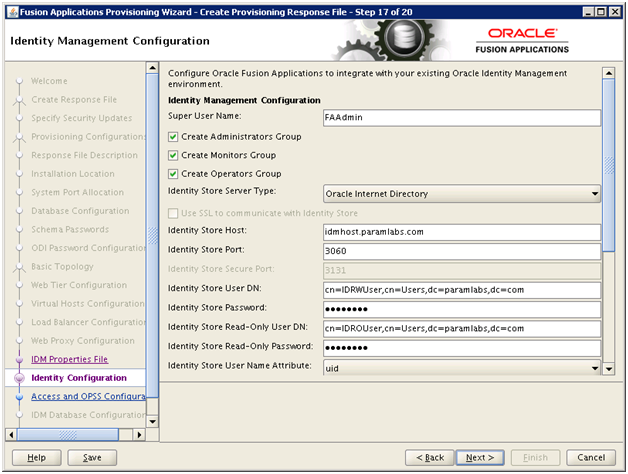
Most of the values will be populated here.
Select the 3 checkboxes and enter required passwords.
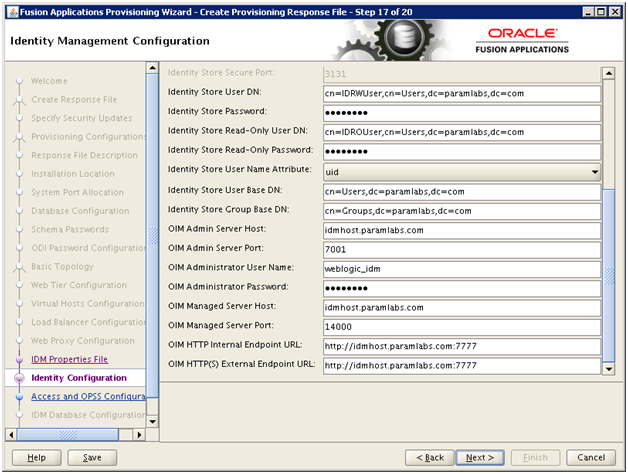
Enter required passwords and external endpoint URL if different, otherwise enter same. Click Next
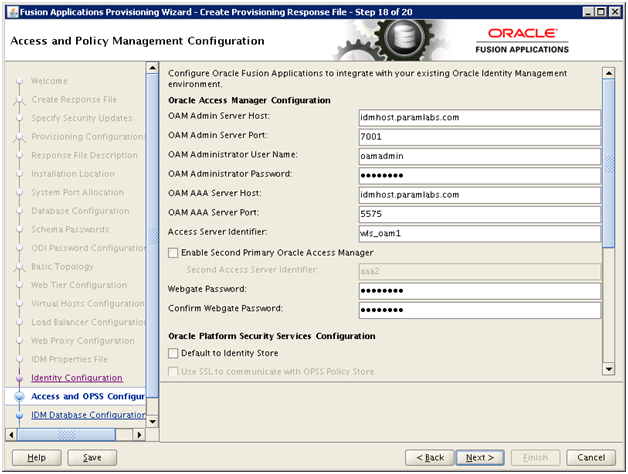
Enter the passwords and verify the details which are automatically populated from the parameter file. Click Next
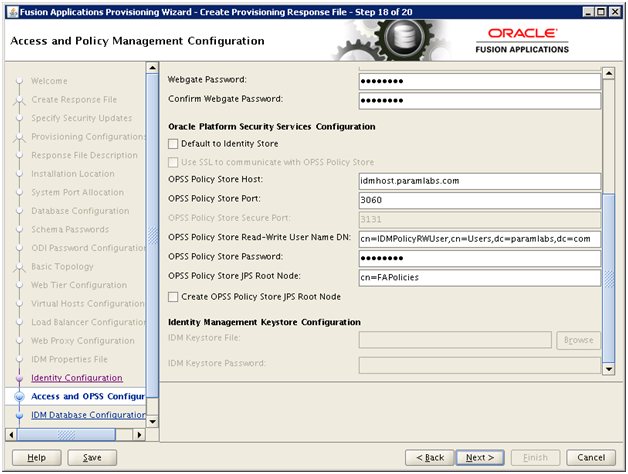
Make sure NOT to check the “Create OPSS Policy Store JPS Root Node” as we were doing in previous releases since here it is already created. Click Next
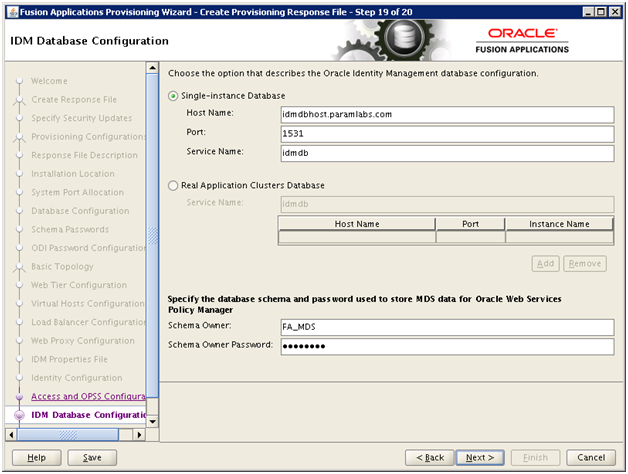
Enter details of IDM database here. Make sure to change the schema owner name to FA_MDS.
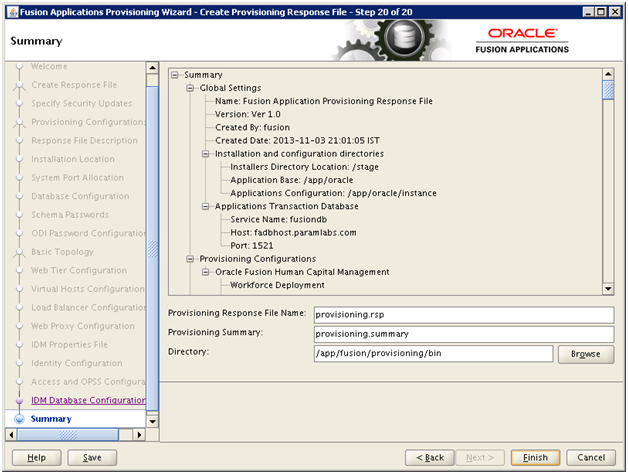
Review the summary and click Finish.
Make a backup of the response file and the summary file if needed.
[fusion@fahost fusion]$ cd /app/fusion/provisioning/bin/
[fusion@fahost bin]$ cp -pr provisioning.rsp provisioning.rsp.bak
[fusion@fahost bin]$ cp -pr provisioning.summary provisioning.summary.bak
Next: Provision an Applications Environment
Installing Oracle Fusion Applications – steps
A. Setting up Identity and Access Management Node
1. Install Fusion Applications Provisioning Framework
2. Install Oracle 11g Database (Identity management database)
3. Run Repository Creation Utility (RCU) for Oracle Identity Management components
4. Install Identity Management Provisioning Wizard
5. Create IDM provisioning Response File
6. Provision Identity Management
7. Perform Post-Provisioning Configuration
B. Setting up Fusion Applications Node
1. Install Fusion Applications Provisioning Framework
2. Install Oracle 11g Database (Fusion Apps Database)
3. Run Oracle Fusion Applications Repository Creation Utility (Applications RCU)
4. Create new Applications Provisioning Response File
Dear Tushar,
thank you, one more question, one idmhost, the OIM port no. is 7777.
but on second node while configuring showing weblogic_idm port 7001.
which i have to put? 7777 or 7001?
pl. reply
Regards,
Sidharth Mahajan
No, not fixed. Sorry I had not seen your reply from earlier. And those solutions you suggested are not relevant to my issue. I will send you those log files.
Thanks,
Steve
I am provisioning 11.1.7 on Linux x_64 and I am getting as far as the Configure stage in the Applications Provisioning. It is falling over with this error in techpatch_1.log.
ERROR:1: Error occured while launching the techpatch utility Failed to load environment properties file. [oracle.as.install.fatputil
.util.exception.PAException: Failed to load environment properties file.
NOTIFICATION:1: Location of Fusion environment properties file is : /ora/app/fa/instance/fapatch/FUSION_env.properties
That file exists and is owned by the user doing the installation so I don’t know what the problem might be. I have set permissions on the entire directory tree to 777 but that has not helped.
Dear Steve,
I am aware about one possible error in techpatch step in configure phase but not exactly this one. Can you send me the techpatch_1.log fle as well as postconfigure log file for particular product (should be fs) to contact [at] oratraining [dot] and I will look into it.
Regards
Tushar
Dear Steve,
Since you did not send the file so most likely the issue would have been resolved. By the way our another reader also had the same issue and he fixed it. You can check the comment here. http://www.oratraining.com/blog/2013/11/install-identity-management-database/#comment-10204